All posts by sophia

edgar cayce’s diet and recipe guide

Edgar Cayce‚ known as the “father of holistic medicine‚” emphasized the importance of diet in maintaining health. His readings suggest an 80/20 alkaline-to-acid food ratio‚ promoting balance and longevity. This guide offers practical recipes and tips for a holistic lifestyle‚ focusing on whole‚ preservative-free foods and proper preparation. It also highlights mental and emotional factors in eating‚ encouraging a positive mindset for optimal wellness.

Who Was Edgar Cayce?

Edgar Cayce‚ often called the “father of holistic medicine‚” was a psychic and healer known for his “readings” that provided insights into health‚ spirituality‚ and human potential. Born in 1877‚ Cayce gained fame for his ability to diagnose illnesses and recommend treatments while in a trance-like state. His readings emphasized the importance of diet‚ mental attitudes‚ and natural remedies for achieving wellness. Through his work‚ Cayce founded the Association for Research and Enlightenment (A.R.E.)‚ which continues to share his teachings on health‚ spirituality‚ and personal growth. His legacy endures as a pioneer in holistic health practices.

Overview of the Cayce Diet

The Cayce Diet focuses on achieving an acid-alkaline balance‚ emphasizing 80% alkaline-forming foods and 20% acid-forming foods. It avoids harmful combinations like citrus juices with cereals and milk in coffee or tea. The diet promotes whole‚ preservative-free foods‚ such as leafy greens‚ whole grains‚ and fish‚ while limiting processed and fried foods. Proper food preparation and mental state during meals are also stressed‚ as negative emotions can hinder digestion. This holistic approach aims to nurture both physical and mental well-being‚ aligning with principles similar to the Mediterranean Diet.

Importance of Alkaline-Forming Foods

Alkaline-forming foods are crucial in Edgar Cayce’s diet for maintaining bodily balance and preventing disease. These foods‚ such as vegetables‚ fruits‚ and whole grains‚ help neutralize acidity‚ promoting a healthy pH level. A diet rich in alkaline-forming foods supports energy levels‚ digestion‚ and overall wellness‚ while reducing inflammation and acidity-related health issues. Cayce emphasized their role in long-term health‚ making them a cornerstone of his dietary recommendations.

Core Principles of Edgar Cayce’s Diet

Edgar Cayce’s diet focuses on maintaining an 80/20 alkaline-to-acid food balance‚ avoiding harmful combinations‚ and proper preparation to preserve nutrients. It emphasizes whole‚ preservative-free foods for holistic health.

The 80/20 Alkaline-to-Acid Food Ratio

Edgar Cayce’s diet advocates an 80/20 alkaline-to-acid food ratio‚ ensuring optimal health by reducing acidity and promoting vitality. Alkaline-forming foods‚ such as vegetables‚ fruits‚ and whole grains‚ should dominate meals‚ while acid-forming foods like meats‚ processed items‚ and sweets are consumed in moderation. This balance prevents chronic illnesses and supports digestion‚ energy‚ and overall well-being‚ aligning with Cayce’s holistic approach to nutrition and health.

Alkaline-Forming Foods: Examples and Benefits

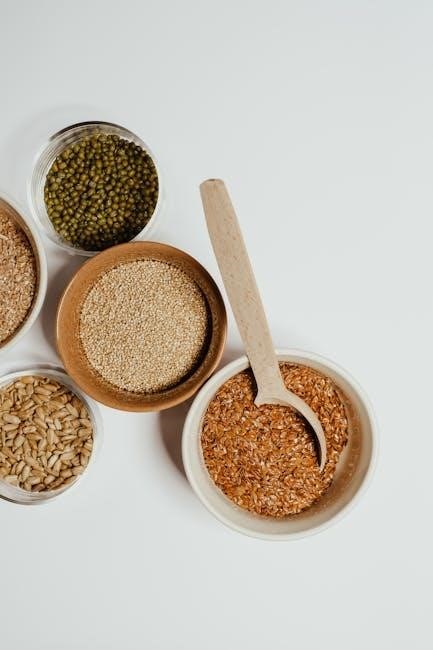
Alkaline-forming foods are crucial in Edgar Cayce’s diet‚ promoting a balanced pH and overall health. Examples include leafy greens like spinach and kale‚ fresh fruits such as citrus and apples‚ and whole grains like oats and barley. These foods help neutralize acidity‚ enhance digestion‚ and boost energy levels. Incorporating them into meals supports immune function and reduces inflammation‚ aligning with Cayce’s emphasis on natural healing and holistic wellness.

Acid-Forming Foods: What to Limit

Acid-forming foods‚ such as red meats‚ processed items‚ and starches‚ should be consumed in moderation. These foods can disrupt the body’s pH balance when overeaten. Cayce’s diet suggests limiting them to 20% of daily intake. Avoiding excessive consumption of sweets‚ dairy‚ and refined grains helps maintain health. By reducing acid-forming foods‚ individuals can prevent chronic conditions and promote a balanced digestive system. This approach aligns with Cayce’s holistic principles‚ emphasizing natural healing through dietary choices.

Food Combinations to Avoid

Citrus juices with cereals‚ milk in coffee or tea‚ fried foods‚ and combining starchy foods like white bread or potatoes are discouraged by Cayce’s dietary principles.

Citrus Juices and Cereals

Edgar Cayce advised against consuming citrus juices and cereals together‚ as their combination can disrupt digestion. Citrus juices are highly acidic‚ potentially interfering with the proper breakdown of carbohydrates in cereals. This mismatch may lead to digestive discomfort or imbalances. Instead‚ consider having citrus fruits separately from cereal meals to maintain optimal acid-alkaline balance. Proper food pairing is essential for avoiding digestive stress and ensuring nutrients are absorbed effectively‚ aligning with Cayce’s holistic approach to nutrition and overall well-being.

Milk or Cream in Coffee or Tea

Edgar Cayce recommended avoiding milk or cream in coffee or tea‚ as this combination may hinder digestion and create acidity. Dairy products can curdle when mixed with acidic beverages like coffee or tea‚ potentially causing indigestion and discomfort. This practice aligns with Cayce’s emphasis on maintaining an alkaline environment in the body. By avoiding such mixtures‚ individuals can support better digestive health and overall well-being‚ staying true to the principles of his diet. This guideline helps preserve the body’s balance and promotes holistic health.

Fried Foods

Edgar Cayce strongly advised against consuming fried foods‚ as they are difficult to digest and can disrupt the body’s acid-alkaline balance. Fried foods are typically high in unhealthy fats and contribute to acidity‚ which Cayce associated with various health issues. Avoiding fried foods helps maintain the recommended 80/20 alkaline-to-acid ratio and supports overall well-being. This guideline aligns with Cayce’s emphasis on holistic health and proper digestion‚ encouraging a diet rich in whole‚ unprocessed foods instead.

Combining Starchy Foods

Edgar Cayce’s diet advises against combining starchy foods‚ such as white bread‚ potatoes‚ or pasta‚ in the same meal‚ as this can impede digestion and create acidity. Starchy foods are acid-forming and should be limited to avoid disrupting the body’s alkaline balance. Instead‚ focus on pairing starches with non-starchy vegetables to maintain the 80/20 alkaline-to-acid ratio. Avoiding such combinations supports better digestion and overall well-being‚ aligning with Cayce’s holistic approach to nutrition and health.

Daily Menu Outline

Edgar Cayce’s daily menu suggests starting with citrus or cereal for breakfast‚ a raw vegetable or fruit salad for lunch‚ and steamed vegetables with protein for dinner‚ maintaining the 80/20 alkaline-to-acid balance.

Breakfast Options

Edgar Cayce’s diet recommends starting the day with either citrus fruits or cooked/dry cereals. Citrus options like oranges or grapefruits provide alkaline-forming properties andrefreshing energy. Whole-grain cereals‚ such as oatmeal‚ are also ideal for a balanced start. These choices align with the 80/20 alkaline-to-acid ratio‚ promoting vitality. Avoid combining citrus juices with cereals‚ as it may hinder digestion. Opt for whole‚ unprocessed foods to maximize nutrient intake and maintain mental clarity. A positive mindset while eating is crucial‚ as Cayce emphasized the impact of emotions on digestion and overall well-being.

Lunch Suggestions

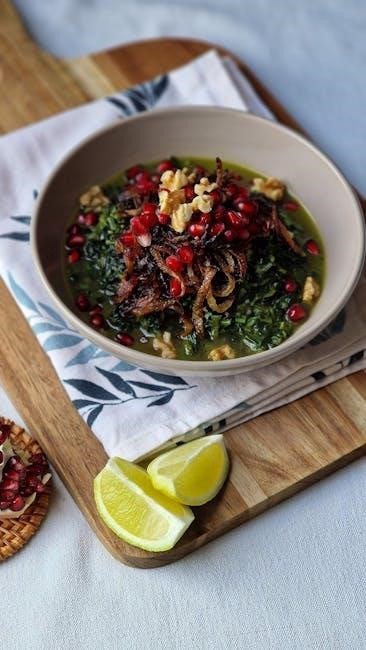
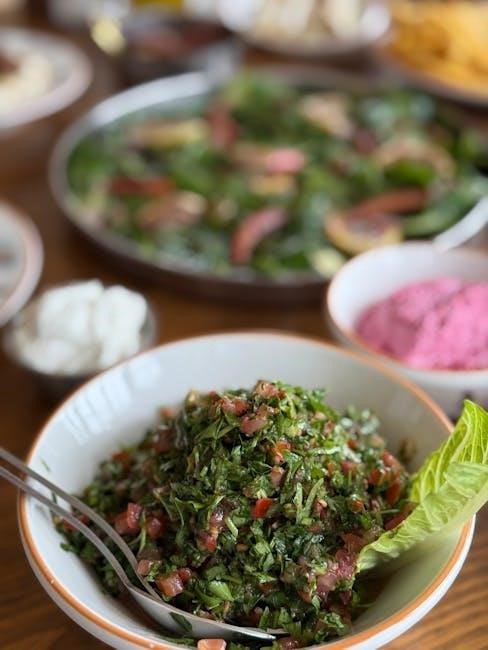
Edgar Cayce’s diet suggests raw vegetable salads with healthy dressings or fruit salads for lunch. These options are alkaline-forming and provide essential nutrients. Include leafy greens like spinach or kale‚ paired with seasonal fruits for variety. Avoid harmful food combinations‚ such as mixing starches or fried foods. Opt for whole‚ unprocessed ingredients to maintain balance and energy. Cayce also recommended fish‚ fowl‚ or lamb as protein sources if included in the meal. A mindful and positive attitude during eating enhances digestion and overall well-being‚ aligning with Cayce’s holistic approach to nutrition.

Dinner Recommendations

Dinner in Edgar Cayce’s diet typically features steamed vegetables paired with lean proteins like fish‚ poultry‚ or lamb. These options are alkaline-forming and support overall health. Include a variety of colorful vegetables‚ such as broccoli‚ carrots‚ and green beans‚ to maximize nutrient intake. Cayce also advised avoiding heavy‚ fried‚ or processed foods in the evening to promote digestion and rest. This balanced approach ensures a satisfying and nutritious meal‚ aligning with Cayce’s emphasis on whole‚ natural foods for optimal well-being and longevity.

Proper Food Preparation

Proper food preparation is vital to preserve nutrients and avoid toxicity. Steam vegetables gently to retain vitamins and minerals. Avoid frying and over-processing foods‚ as they can create harmful substances. Cayce emphasized cooking methods that maintain food’s natural integrity‚ promoting better digestion and overall health.

Preserving Nutrients

Proper food preparation is key to preserving nutrients. Steam vegetables gently to retain vitamins and minerals. Avoid overcooking‚ as it can destroy enzymes and reduce nutritional value. Raw foods‚ like salads‚ maintain their natural integrity and provide live enzymes essential for digestion. Cayce recommended minimal processing to keep foods in their most natural state‚ ensuring maximum nutritional benefit. This approach supports vitality and aligns with the holistic principles of his diet‚ emphasizing the importance of nutrient-rich meals for optimal health and wellness.

Avoiding Toxicity

Edgar Cayce stressed the importance of avoiding toxic substances in the diet. Fried foods‚ processed ingredients‚ and excessive fats should be minimized to prevent bodily harm. Certain food combinations‚ like citrus juices with cereals‚ can disrupt digestion and lead to toxicity. Additionally‚ mental and emotional states play a role; eating while stressed or angry can turn even healthy foods into toxins. Cayce recommended mindful eating and avoiding harmful substances to maintain a balanced‚ healthy body. This approach ensures the body remains free from unnecessary toxins‚ promoting overall well-being and vitality.

Mental and Emotional Factors in Eating

Edgar Cayce emphasized that mental and emotional states significantly impact digestion and health. Stress‚ anger‚ or sadness can turn even nutritious food into toxins‚ he believed.

Eating with a Positive Mindset

Edgar Cayce stressed the importance of maintaining a positive mindset while eating‚ as negative emotions like anger or worry can disrupt digestion. He believed that food consumed in a stressful state could become toxic to the body. Cultivating gratitude and calmness during meals enhances nutrient absorption and overall well-being. This holistic approach emphasizes the connection between mind‚ body‚ and spirit‚ ensuring that meals nourish not just the body but also the soul.

Impact of Negative Emotions on Digestion

According to Edgar Cayce‚ negative emotions such as anger‚ worry‚ or stress significantly impair digestion. These emotions can disrupt the body’s ability to absorb nutrients and may lead to poor assimilation of food. Cayce emphasized that mental states directly influence physical health‚ making it crucial to approach meals with calmness and positivity. Emotional turmoil can hinder digestive processes‚ potentially causing discomfort and health issues. Thus‚ fostering a serene mindset is essential for optimal digestion and overall well-being.

Snacks and Desserts

Healthy snacks like fresh fruits and nuts align with Cayce’s alkaline-forming principles. Natural desserts‚ such as fruit salads‚ offer sweet‚ nutritious options without compromising dietary balance.

Healthy Snack Ideas

Edgar Cayce’s diet encourages snacking on alkaline-forming foods like fresh fruits‚ raw vegetables‚ and nuts; Apples‚ bananas‚ and citrus fruits are excellent choices. Raw veggies such as carrots‚ celery‚ and cucumbers make great crunchy snacks. Nuts like almonds and walnuts are also recommended‚ though in moderation. Avoid processed or fried options. These snacks provide essential nutrients‚ support digestion‚ and align with the 80/20 alkaline-to-acid ratio. Incorporating these into your routine fosters a balanced and holistic approach to eating. Choose whole‚ natural options to maximize health benefits and energy.

Natural Dessert Options

Edgar Cayce’s diet advocates for natural‚ alkaline-forming desserts made with whole‚ unprocessed ingredients. Fresh fruit salads‚ baked apples‚ and poached pears are ideal choices. Dates‚ figs‚ and nuts like almonds or walnuts also make satisfying sweet treats. Avoid refined sugars and opt for natural sweeteners like honey or maple syrup. These desserts align with the 80/20 alkaline-to-acid ratio‚ promoting balance and health. They satisfy cravings while supporting overall wellness and digestion. Choose seasonal and organic options whenever possible for the best flavor and nutritional benefits.

Connection to the Mediterranean Diet

Edgar Cayce’s diet mirrors the Mediterranean approach‚ emphasizing whole‚ preservative-free foods‚ fish‚ and whole grains; Both promote alkaline-forming foods and limit red meat‚ fostering long-term health benefits.

Historical Context

Edgar Cayce’s dietary principles‚ developed in the early 20th century‚ were revolutionary for their time. His readings emphasized alkaline-forming foods‚ seasonal eating‚ and holistic health‚ aligning with ancient Greek medical concepts of balance. The Mediterranean Diet‚ popularized later‚ shares similarities with Cayce’s approach‚ focusing on whole grains‚ fish‚ and vegetables. Cayce’s teachings were ahead of his era‚ laying the groundwork for modern dietary practices that prioritize natural‚ unprocessed foods and mental well-being.

Modern Relevance

Edgar Cayce’s dietary principles remain highly relevant today‚ resonating with contemporary health trends. The emphasis on alkaline-forming foods‚ whole grains‚ and fresh produce aligns with modern nutrition science. His recommendations on avoiding processed foods and harmful food combinations are increasingly recognized for their health benefits. The rise of holistic wellness has further popularized Cayce’s approach‚ making his teachings a timeless guide for achieving physical and mental balance in today’s fast-paced world.

Edgar Cayce’s A.R.E. Organization

Edgar Cayce’s A.R.E. (Association for Research and Enlightenment) is a nonprofit dedicated to holistic health‚ education‚ and research‚ offering resources for wellness and spiritual growth.

About the Association for Research and Enlightenment

The Association for Research and Enlightenment (A.R.E.) is a nonprofit organization founded by Edgar Cayce‚ dedicated to promoting holistic health‚ personal empowerment‚ and spiritual growth. A.R.E. offers resources such as books‚ articles‚ and workshops based on Cayce’s readings‚ which emphasize the mind-body-spirit connection. The organization provides practical tools for wellness‚ including dietary guidelines and recipes‚ to help individuals achieve balance and harmony in their lives. A.R.E. also publishes materials to guide followers in implementing Cayce’s health recommendations effectively.

Resources and Publications

The Association for Research and Enlightenment (A.R.E.) offers a wealth of resources to guide individuals in implementing Edgar Cayce’s dietary principles. Publications include the “Edgar Cayce Diet and Recipe Guide‚” which provides detailed meal plans and recipes aligned with the 80/20 alkaline-to-acid ratio. Additionally‚ the A.R.E. publishes a handy Basic Diet Chart‚ available as a downloadable PDF or laminated magnet‚ to serve as a daily reminder of recommended food choices. These resources empower individuals to adopt a holistic approach to nutrition and wellness‚ inspired by Cayce’s readings.

Recipe Highlights

Edgar Cayce’s guide features recipes like “Cool-Off Gazpacho‚” a refreshing blend of vegetables‚ and “Winter Breakfast Oatmeal‚” emphasizing nutrient-rich ingredients. These dishes align with Cayce’s alkaline-based diet‚ focusing on fresh‚ wholesome foods to promote holistic wellness and vitality. The recipes are simple‚ flavorful‚ and designed to support overall health‚ reflecting Cayce’s philosophy of balance and natural nutrition.

Cool-Off Gazpacho Recipe

This refreshing gazpacho is a perfect blend of health and flavor‚ aligning with Edgar Cayce’s alkaline-focused diet; Made with fresh vegetables like onion‚ garlic‚ tomatoes‚ cucumber‚ and green pepper‚ it serves four and is ideal for warm days. The recipe emphasizes whole‚ preservative-free ingredients‚ promoting vitality and balance. Easy to prepare‚ it showcases Cayce’s philosophy of using natural foods to nourish the body. Serve chilled‚ garnished with fresh herbs for added freshness and nutritional benefits.

Winter Breakfast Oatmeal

Edgar Cayce’s Winter Breakfast Oatmeal is a cozy‚ nutrient-rich start to the day. Made with whole grains and fresh ingredients‚ it supports the body’s natural alkaline balance. The recipe incorporates oats‚ fruits‚ and nuts‚ providing sustained energy and warmth. Cayce’s emphasis on whole‚ preservative-free foods is reflected in this hearty dish‚ perfect for colder months. It aligns with his holistic approach to nutrition‚ promoting vitality and mental clarity through balanced‚ seasonal eating.

Edgar Cayce’s diet and recipe guide offers a balanced‚ holistic approach to nutrition‚ emphasizing alkaline-rich foods and mindful eating. Its practical recipes and principles promote long-term health and vitality‚ encouraging a positive relationship with food for overall well-being.

Edgar Cayce’s diet and recipe guide promotes vitality and longevity by balancing alkaline and acid foods. It helps prevent chronic diseases‚ improves digestion‚ and boosts immunity. Emphasizing whole‚ seasonal ingredients‚ the diet supports mental clarity and overall well-being. By following its principles‚ individuals can achieve a healthier lifestyle‚ reduce toxicity‚ and enhance spiritual balance. The guide’s practical recipes and holistic approach make it accessible for those seeking long-term wellness and harmony in body‚ mind‚ and spirit.

Encouragement for Implementation

Embracing Edgar Cayce’s diet and recipe guide can transform your approach to health and nutrition. Start by incorporating small changes‚ like adding more alkaline-forming foods and mindful eating practices. Gradually adopt the 80/20 ratio and explore the provided recipes. Patience and consistency are key to experiencing the benefits. Remember‚ this holistic approach is not just a diet but a pathway to overall well-being‚ offering long-term rewards for your body‚ mind‚ and spirit. Take the first step today and embark on a journey toward a healthier‚ more balanced life.

tabernacle prayer guide

The Tabernacle Prayer Guide offers a profound journey through sacred spaces and symbols, helping believers deepen their prayer life by connecting modern worship with ancient biblical traditions.

Understanding the Tabernacle as a Sacred Space

The Tabernacle, as described in the Bible, was a portable place of worship designed by God Himself, symbolizing His desire to dwell among His people. It served as a sacred space where the Israelites could encounter God’s presence, offer sacrifices, and connect with the divine. The Tabernacle’s structure, divided into the Outer Court, Holy Place, and Most Holy Place, represented a progression from external worship to intimate communion with God. Each element, from the Altar of Burnt Offering to the Ark of the Covenant, held deep spiritual significance, teaching the people about sin, redemption, and God’s holiness. This sacred space was not just a physical structure but a spiritual blueprint, guiding believers in prayer and worship. Through its design, the Tabernacle reminds us of the importance of approaching God with reverence, thanksgiving, and a humble heart.

The Significance of Prayer in the Tabernacle Tradition

Prayer holds a central role in the Tabernacle tradition, serving as a bridge between earthly and heavenly realms. The Tabernacle was not merely a physical structure but a spiritual framework for connecting with God. Through sacrifices, offerings, and rituals, the Israelites expressed their devotion, seeking forgiveness and communion with the Divine. Prayer in this context was an act of worship, thanksgiving, and intercession, reflecting the people’s dependence on God. The Altar of Incense, with its perpetual prayer offerings, symbolized the ascent of prayers to heaven. This tradition emphasizes prayer as a means to enter God’s presence, align with His will, and experience spiritual transformation. By understanding the Tabernacle’s prayer practices, modern believers can deepen their own prayer lives, drawing inspiration from its rich symbolism and spiritual depth.

Historical Background of the Tabernacle

The Tabernacle, also known as the Tent of Meeting, was a portable place of worship constructed by the Israelites under Moses’ leadership around 1446 BCE. Designed according to God’s detailed instructions on Mount Sinai, it served as a sacred space where God would dwell among His people. The Tabernacle was built during the wilderness wanderings, symbolizing God’s presence and provision for His people. It was a temporary structure, replaced later by Solomon’s Temple in Jerusalem. The Tabernacle’s design reflected deep spiritual symbolism, with each element pointing to God’s covenant and redemption. Its historical significance lies in its role as a unifying center for Israel’s worship, sacrifice, and communal life. The Tabernacle’s legacy endures as a powerful reminder of God’s desire to dwell with humanity, shaping prayer traditions and spiritual practices for generations.

The Structure of the Tabernacle and Its Symbolism

The Tabernacle’s structure, from the Outer Court to the Most Holy Place, symbolizes a progressive journey into God’s presence, reflecting purification, atonement, and divine encounter through its sacred design.

The Outer Court: A Place of Thanksgiving and Praise

The Outer Court of the Tabernacle represents the initial step in approaching God, embodying a spirit of thanksgiving and praise. It symbolizes the believer’s entrance into a life of worship, where they acknowledge God’s sovereignty and grace. As described in Psalm 100, this space invites believers to “enter His gates with thanksgiving and His courts with praise.” The Outer Court housed the Altar of Burnt Offering and the Bronze Laver, which served as reminders of sacrifice, cleansing, and preparation for deeper communion with God. This sacred area teaches us to begin our prayer journey with gratitude, recognizing God’s faithfulness and surrendering our lives as living sacrifices. By reflecting on the Outer Court, we learn to cultivate a heart of praise and humility, laying a foundation for meaningful prayer and fellowship with God.

The Altar of Burnt Offering: Symbol of Sacrifice and Atonement

The Altar of Burnt Offering stands as a powerful symbol of sacrifice and atonement, representing the heart of worship in the Tabernacle. It was here that offerings were presented to God, signifying repentance, dedication, and devotion. The shedding of blood on the altar pointed to the ultimate sacrifice of Jesus Christ, who atoned for humanity’s sins. This sacred structure teaches believers the importance of surrendering their lives as living sacrifices to God. In prayer, the Altar of Burnt Offering reminds us to approach God with humility, acknowledging our need for cleansing and forgiveness. By reflecting on this symbol, we are inspired to offer our prayers with sincerity, laying our hearts before God as an act of worship and surrender.

The Bronze Laver: Representation of Cleansing and Purification

The Bronze Laver, positioned between the Altar of Burnt Offering and the Holy Place, symbolized cleansing and purification for the priests before they entered God’s presence. Made of bronze, it was filled with water for ritual washing, emphasizing the importance of spiritual and physical purity. This sacred vessel reminds us that true worship begins with a clean heart and life. In prayer, the Bronze Laver encourages believers to reflect on their need for cleansing and to seek God’s purification. Just as the priests washed before serving, we are called to surrender our impurities to Christ, who cleanses us through His grace. The Bronze Laver serves as a powerful reminder of God’s desire for His people to walk in holiness and integrity, both in their daily lives and in their communion with Him.

The Holy Place: The Table of Showbread and the Golden Lampstand

The Holy Place, a sacred chamber within the Tabernacle, housed two significant furnishings: the Table of Showbread and the Golden Lampstand. The Table of Showbread symbolized God’s presence and provision, with twelve loaves representing the twelve tribes of Israel, signifying unity and divine sustenance. The Golden Lampstand, crafted with intricate care, provided light, embodying God’s radiant presence and wisdom. These elements guide believers in prayer to seek spiritual nourishment and illumination. The Table of Showbread invites gratitude for God’s provision, while the Lampstand encourages prayers for wisdom and clarity. Together, they remind us that prayer is a place of divine encounter, where we commune with God in His light and feasting on His Word. These symbols inspire deep reverence and intimacy in our prayer lives, drawing us closer to God’s heart.

The Most Holy Place: The Ark of the Covenant and God’s Presence

The Most Holy Place was the innermost sanctuary of the Tabernacle, housing the Ark of the Covenant, a symbol of God’s divine presence and mercy. The Ark contained the Ten Commandments, Aaron’s rod, and a jar of manna, representing God’s covenant, authority, and provision. The mercy seat, placed atop the Ark, was where atonement was made for Israel’s sins. Only the high priest could enter this sacred space once a year on the Day of Atonement. For prayer, the Most Holy Place inspires reverence and humility, reminding us of God’s holiness and the necessity of atonement. It points to Christ, who became our mercy seat, allowing direct access to God’s presence. Praying from this perspective, believers can seek forgiveness, mercy, and intimacy with God, understanding prayer as a sacred encounter with the Divine.

Prayer Models Inspired by the Tabernacle

The Tabernacle’s structure and symbolism provide a rich framework for prayer, guiding believers to worship, repentance, and intimacy with God through its sacred spaces and rituals.

Praying Through the Stations of the Tabernacle

Praying through the stations of the Tabernacle offers a structured and meaningful way to connect with God; Begin in the Outer Court, thanking Him for His blessings and praising His majesty. Move to the Altar of Burnt Offering, reflecting on sacrifice and atonement, seeking forgiveness for sins. At the Bronze Laver, pray for cleansing and purification, asking the Holy Spirit to sanctify your heart. Enter the Holy Place, focusing on the Table of Showbread, symbolizing communion and intimacy with God, and the Golden Lampstand, representing His divine light guiding your path. Finally, approach the Most Holy Place, humbling yourself before God’s presence, interceding for others, and seeking His will. This journey mirrors the Tabernacle’s design, leading you deeper into worship and fellowship with God.

Using the Tabernacle as a Guide for Personal Worship

The Tabernacle serves as a powerful blueprint for personal worship, offering a structured yet intimate way to connect with God. Begin by entering the Outer Court, where thanksgiving and praise set the tone for your worship. Reflect on the Altar of Burnt Offering, symbolizing sacrifice and atonement, and surrender your heart to God. At the Bronze Laver, pray for cleansing and purification, seeking the Holy Spirit’s refining work in your life. In the Holy Place, focus on the Table of Showbread, representing communion with God, and the Golden Lampstand, illuminating your path. Finally, approach the Most Holy Place, where you can encounter God’s presence and intercede for others. This journey through the Tabernacle’s stations creates a holistic worship experience, guiding you to deeper intimacy and alignment with God’s will.

Praying in Alignment with the Tabernacle’s Symbolism

Praying in alignment with the Tabernacle’s symbolism invites believers to engage deeply with its spiritual imagery. The Outer Court, representing thanksgiving, calls us to begin prayer with praise and gratitude. The Altar of Burnt Offering symbolizes sacrifice, prompting us to surrender sins and desires to God. At the Bronze Laver, pray for cleansing and purification, reflecting on the Holy Spirit’s refining work. In the Holy Place, the Table of Showbread and Golden Lampstand inspire prayers of communion and illumination. Finally, the Most Holy Place, housing the Ark of the Covenant, invites bold intercession, trusting in God’s presence and mercy. By aligning prayers with these symbols, worship becomes a structured, meaningful journey, drawing believers closer to God’s heart and transforming their prayer life into a sacred, intentional encounter.

Prayer as a Means to Enter God’s Presence

Prayer serves as a sacred pathway to enter God’s divine presence, mirroring the Tabernacle’s purpose as a meeting place between God and humanity. The Tabernacle’s structure symbolizes a journey from outer courts to the Most Holy Place, where God dwells. Similarly, prayer transitions believers from external praises to intimate communion with God. By surrendering sins, seeking cleansing, and offering thanksgiving, prayer aligns the heart with God’s holiness. The Holy Spirit anoints believers, enabling them to stand in God’s presence boldly, as seen in the High Priest’s role. Prayer, thus, becomes a spiritual sacrifice, bridging earthly limitations and heavenly realms, allowing believers to experience God’s transformative presence and grace. This sacred exchange revitalizes faith and deepens devotion, fulfilling the Tabernacle’s promise of divine encounter in modern worship.

Practical Applications of Tabernacle Prayer

Tabernacle Prayer offers daily communion with God, fostering personal worship, intercession, and spiritual growth through structured, meaningful prayer practices inspired by biblical symbolism and traditions.

Daily Prayer and Communion with God

Daily prayer, inspired by the Tabernacle, fosters a deeper connection with God. By structuring prayer around the Tabernacle’s stations, believers can express gratitude, seek cleansing, and enter God’s presence. This practice encourages consistent communion, reflecting the sacred spaces of worship. Each day becomes an opportunity to align with divine purposes, drawing strength and guidance. Prayer guides help maintain focus, ensuring meaningful time with God. Through this disciplined approach, faith is strengthened, and intimacy with God grows, transforming daily life into a sacred encounter. The Tabernacle model reminds us that prayer is not just a ritual but a living, dynamic relationship with the Almighty.

Sample Prayers for Repentance, Cleansing, and Protection

Prayers inspired by the Tabernacle emphasize spiritual renewal and divine protection. For repentance, one might pray: “Lord, I confess my sins and seek Your forgiveness. Cleanse me through the blood of Christ, as symbolized by the Altar of Burnt Offering.” For cleansing, a prayer could be: “Wash me, Lord, and make me holy, as the Bronze Laver represents purification.” Seeking protection, one might say: “Cover me in Your divine light and peace, as You dwell in the Most Holy Place.” These prayers reflect the Tabernacle’s symbolism, guiding believers to deepen their relationship with God and find refuge in His presence.

Praying for Wisdom and Guidance

Praying for wisdom and guidance is a cornerstone of the Tabernacle Prayer Guide, drawing inspiration from the Ark of the Covenant and the Golden Lampstand. These symbols remind us of God’s divine light and presence. A prayer for wisdom might begin: “Lord, illuminate my path and grant me discernment to make decisions that align with Your will.” For guidance, one could pray: “Father, as the Golden Lampstand represents Your eternal light, shine Your truth in my life and direct my steps.” Such prayers invite believers to seek God’s wisdom in everyday challenges, trusting in His sovereignty and provision. By reflecting on the Tabernacle’s imagery, we find a deeper connection to God’s wisdom and steadfast guidance in our lives.

Praying for Others: Intercession and Fellowship

Praying for others is a vital aspect of the Tabernacle Prayer Guide, reflecting the priestly intercession that once occurred in the Holy Place. This practice mirrors the prayers of the priests who interceded for the people of Israel. By praying for others, believers step into this priestly role, standing in the gap for those in need. The Tabernacle’s Altar of Incense symbolizes these prayers ascending to God, much like the priests’ daily offerings. When praying for others, one might say, “Lord, bring healing to my friend” or “Grant wisdom to our leaders.” Such intercession fosters fellowship and unity, as believers join together in lifting one another before God. This communal act of prayer not only strengthens relationships but also demonstrates Christ’s command to love and serve one another. Through intercession, we embody the heart of God, who desires to see His people thrive and draw closer to Him.

The Role of the Tabernacle in Biblical Prayer

The Tabernacle serves as a divine blueprint, symbolizing God’s presence and guiding believers in structured prayer, reflecting ancient worship practices and sacred communion with Him.

The Tabernacle as a Template for Prayer

The Tabernacle serves as a sacred blueprint for prayer, offering a structured approach to worship and communion with God. Its design reflects the progression of intimacy with God, from the Outer Court to the Most Holy Place, teaching believers how to move from thanksgiving to deeper fellowship. Each element—the Altar of Burnt Offering, the Bronze Laver, and the Ark of the Covenant—symbolizes key aspects of prayer, such as sacrifice, cleansing, and divine presence. By aligning prayers with these symbols, believers can experience a meaningful connection to God’s holiness and grace. This template encourages a balanced prayer life, blending praise, confession, and intercession, while emphasizing the importance of entering God’s presence with reverence and purpose. The Tabernacle thus becomes a timeless guide, bridging ancient traditions with modern worship practices.

Prayer as a Means to Stand in the Gap

Prayer, as illuminated by the Tabernacle tradition, serves as a powerful means of intercession, calling believers to “stand in the gap” for others. This concept, rooted in Ezekiel 22:30, emphasizes the role of prayer in bridging the divide between God’s people and His divine purposes. Through prayer, individuals can intercede for those in need, seeking healing, restoration, and divine intervention. The Tabernacle’s design, particularly the Altar of Incense, symbolizes this intercessory role, as prayers rise like incense before God. By embracing this mantle, believers align themselves with God’s heart for humanity, demonstrating humility and compassion. The Tabernacle Prayer Guide encourages believers to adopt this posture, praying not only for personal needs but also for the broader body of Christ and the world. In doing so, prayer becomes a catalyst for transformation, both individually and corporately, reflecting God’s desire to see His people stand as intercessors in a broken world.

Prayer and the Anointing of the Holy Spirit

Prayer, within the Tabernacle tradition, is deeply intertwined with the anointing of the Holy Spirit, who empowers believers to pray effectively and experience divine presence. The Tabernacle’s design, particularly the Ark of the Covenant and the Holy of Holies, symbolizes the dwelling place of God’s Spirit. Through prayer, believers can invite the Holy Spirit to anoint their lives, enabling them to pray with authority and insight. The anointing brings clarity, boldness, and a deeper connection to God’s will, transforming prayer into a powerful tool for spiritual warfare and ministry. The Tabernacle Prayer Guide emphasizes that prayer is not just a ritual but a means of partnering with the Holy Spirit to fulfill God’s purposes. By seeking the anointing, believers can experience a dynamic, Spirit-led prayer life that transcends mere words and connects deeply with the divine.

Prayer as a Means to Transform and Teach

Prayer, rooted in the Tabernacle tradition, serves as a powerful tool for personal transformation and spiritual instruction. Through prayer, believers are invited to encounter God’s presence, allowing His truth to reshape their hearts and minds. The Tabernacle’s structure, with its emphasis on sacrifice, cleansing, and divine encounter, provides a model for prayer that aligns with God’s will. Prayer teaches humility, surrender, and dependence on God, while also equipping believers to fulfill their calling. The Tabernacle Prayer Guide highlights how prayer transforms lives by fostering intimacy with God and illuminating His Word. It also teaches believers to intercede for others, standing in the gap for those in need. By embracing prayer as a transformative and educational practice, believers can grow in wisdom, holiness, and their ability to reflect God’s love to the world.

Leading Others in Tabernacle Prayer

Leading others in Tabernacle Prayer involves guiding groups through sacred structures, inspiring heartfelt worship, and fostering unity in seeking God’s presence collectively.

Guiding a Group Through Tabernacle-Inspired Prayer

Guiding a group through Tabernacle-inspired prayer involves creating a structured yet intimate atmosphere, encouraging participants to reflect on each station’s symbolism. Begin in the Outer Court, emphasizing thanksgiving and praise, then transition to the Altar of Burnt Offering, focusing on sacrifice and atonement. Use the Bronze Laver to explore cleansing and purification, and move into the Holy Place, highlighting the Table of Showbread and the Golden Lampstand as symbols of God’s presence and provision. Conclude in the Most Holy Place, inviting deep communion with God. Encourage personal reflection, corporate worship, and testimonies, ensuring each participant feels connected to the divine journey. This method fosters unity and enriches individual prayer lives, drawing the group closer to God’s presence.

Using the Tabernacle Model in Corporate Worship

Using the Tabernacle model in corporate worship creates a powerful framework for connecting believers with God’s presence. By structuring services to reflect the Tabernacle’s layout, congregations can experience a progressive journey of praise, cleansing, and intimacy with God. Begin with thanksgiving and praise in the “Outer Court,” transitioning to confession and cleansing at the “Bronze Laver.” Incorporate the “Table of Showbread” and “Golden Lampstand” to symbolize God’s provision and light. Conclude in the “Most Holy Place,” inviting worshippers into a deeper, personal communion with God. This model fosters unity, as the congregation collectively moves through stages of worship, mirroring the Tabernacle’s design. It also enriches the worship experience, helping believers grasp the rich biblical symbolism and draw closer to God’s presence. This approach transforms corporate worship into a transformative, Spirit-led encounter.

Testimonies of Tabernacle Prayer in Action

Many believers have shared powerful testimonies of how the Tabernacle Prayer Guide has transformed their prayer lives. One individual recounted entering the “Outer Court” of praise and thanksgiving, feeling a deep sense of joy and connection to God. Another shared how reflecting on the “Bronze Laver” brought conviction and cleansing, leading to a renewed commitment to holiness. A group of intercessors reported breakthroughs in their prayers after aligning their petitions with the Tabernacle’s symbolism. These stories highlight how the Tabernacle model bridges the ancient and modern, creating a tangible way to encounter God’s presence. Testimonies like these demonstrate the practical and spiritual impact of praying through the Tabernacle, fostering deeper intimacy with God and empowering believers to live out their faith authentically.

Encouraging Others to Deepen Their Prayer Life

Encouraging others to deepen their prayer life through the Tabernacle Prayer Guide fosters a sense of community and shared spiritual growth. By modeling the Tabernacle’s structure, individuals can guide others in exploring sacred spaces symbolically, from thanksgiving in the Outer Court to intimacy in the Most Holy Place. Sharing testimonies of personal transformation and breakthroughs inspires others to embrace this prayer model. Teaching the historical and spiritual significance of each Tabernacle element equips believers to pray with purpose. Providing practical tools, such as sample prayers and reflection questions, helps others apply the guide effectively. Encouraging consistency and sensitivity to the Holy Spirit’s leading ensures that prayer becomes a vibrant, life-changing practice. This approach not only strengthens individual faith but also builds a praying community united in seeking God’s presence and purpose.

The Tabernacle Prayer Guide provides a transformative framework for deepening prayer and worship, connecting modern believers with ancient biblical traditions and fostering intimacy with God’s presence.

The Enduring Relevance of the Tabernacle Prayer Guide

The Tabernacle Prayer Guide remains a timeless resource, bridging ancient biblical traditions with modern prayer practices. Its structured approach to worship and intercession offers believers a profound way to connect with God’s presence. By reflecting on the Tabernacle’s symbolism, such as the altar of sacrifice and the Holy of Holies, worshippers gain deeper insights into prayer’s purpose and power. This guide not only enriches personal devotion but also fosters corporate worship, encouraging communities to unite in prayer. Its enduring relevance lies in its ability to transcend generations, providing a meaningful framework for seeking God’s wisdom, cleansing, and protection. As a spiritual tool, it continues to inspire believers to enter God’s presence with reverence and expectancy, ensuring the Tabernacle’s sacred lessons remain vibrant in contemporary prayer life.

Final Thoughts on Prayer and the Tabernacle

Prayer, as illuminated through the Tabernacle, becomes a sacred journey into God’s presence. The Tabernacle’s structure, from the Outer Court to the Most Holy Place, symbolizes a progression from thanksgiving to intimate communion. This model reminds us that prayer is not just a ritual but a transformative encounter. By aligning our prayers with the Tabernacle’s symbolism, we experience cleansing, sacrifice, and divine connection. The Tabernacle prayer guide invites believers to move beyond superficial devotion, embracing a deeper, Spirit-led prayer life. It underscores prayer’s power to transform lives, communities, and the world. Ultimately, the Tabernacle prayer guide serves as a timeless blueprint, guiding worshippers to stand in the gap, intercede for others, and experience the anointing of the Holy Spirit in their prayer journeys.

PDF

the complete power bi interview guide pdf

This comprehensive guide provides in-depth preparation for Power BI interviews, covering basics, advanced topics, and real-world scenarios. It includes expert tips, common questions, and practical examples to help you excel.

1.1 Overview of the Guide

This guide is a comprehensive resource designed to help professionals prepare for Power BI interviews. It covers essential topics such as data visualization, DAX formulas, Power Query, and advanced analytics. The guide includes over 90 frequently asked questions, expert answers, and practical examples to ensure readiness for technical assessments. It also provides tips for acing interviews, including behavioral and scenario-based questions. Suitable for all experience levels, the guide bridges theory and practice, making it a valuable tool for anyone aiming to excel in Power BI roles.

1.2 Importance of Power BI in Data Analytics

Power BI is a transformative tool in data analytics, enabling organizations to turn raw data into actionable insights. Its user-friendly interface and robust capabilities make it accessible to both technical and non-technical users. Power BI empowers businesses to make data-driven decisions, enhance operational efficiency, and uncover hidden trends. By integrating seamlessly with Microsoft tools like Excel and Dynamics, it streamlines workflows and boosts productivity. Its real-time analytics and scalable solutions cater to organizations of all sizes, making it indispensable for modern business intelligence needs.

1.3 Target Audience for the Guide

This guide is designed for aspiring and experienced professionals seeking to excel in Power BI roles. It caters to data analysts, business intelligence developers, and data scientists. Whether you’re a fresher aiming to land your first job or a seasoned expert looking to advance, this resource provides tailored insights. The guide also benefits IT professionals transitioning into data analytics and business users leveraging Power BI for decision-making. Its comprehensive coverage ensures all skill levels gain valuable knowledge to succeed in their careers and technical interviews.

Power BI Basics

Power BI is a Microsoft business analytics tool enabling data visualization and insights. This section covers its definition, components, and core functionalities for beginners.

2.1 What is Power BI?

Power BI is a Microsoft business analytics tool enabling data visualization and insights. It transforms raw data into interactive dashboards and reports, helping organizations make informed decisions. Designed for business users, Power BI supports various data sources, including Excel, SQL, and cloud-based platforms. Its user-friendly interface allows non-technical users to create visualizations and gain insights efficiently. Power BI is widely used in industries for its scalability, affordability, and integration with Microsoft products, making it a powerful solution for data-driven decision-making. It bridges the gap between data analysis and business strategy, empowering users to uncover trends and opportunities effectively.

2.2 Key Components of Power BI

Power BI comprises three main components: Power BI Desktop, Power BI Service, and Power BI Mobile. Power BI Desktop is used for creating and designing reports, while Power BI Service is a cloud-based platform for publishing and sharing dashboards. Power BI Mobile enables on-the-go access to reports. Additionally, Power Query handles data transformation, Power Pivot manages data modeling, and DAX is used for advanced calculations. Together, these components provide a robust platform for data analysis, visualization, and collaboration, catering to diverse business needs and ensuring seamless data-driven decision-making across organizations.

2.3 Power BI Desktop vs. Power BI Service vs. Power BI Mobile

Power BI Desktop is a desktop application used for creating and designing reports, offering advanced data modeling and visualization tools. Power BI Service is a cloud-based platform for publishing, sharing, and managing dashboards, enabling collaboration. Power BI Mobile provides access to reports on-the-go, ensuring flexibility. While Desktop focuses on creation, Service on sharing, and Mobile on accessibility, they integrate seamlessly, allowing users to create, share, and consume data insights across devices. This trio empowers businesses to make data-driven decisions efficiently, regardless of location or device.

Power BI Interview Questions for Beginners

This section covers essential questions for newcomers, focusing on general Power BI concepts, data sources, and foundational skills to build a strong understanding of the tool.

3.1 General Power BI Questions

These questions assess your foundational knowledge of Power BI, covering its definition, key components, data sources, and core functionalities. Examples include explaining Power BI’s purpose, its primary tools, and common use cases. Understanding these basics is crucial for demonstrating your proficiency and readiness to tackle more complex topics. This section ensures you have a solid grasp of the platform before moving on to advanced concepts, making it essential for both new learners and experienced professionals preparing for interviews.

3.2 Data Sources and Connectivity Modes

Understanding the various data sources and connectivity modes is vital for working with Power BI. Common sources include databases, Excel files, cloud services, and big data platforms. Connectivity modes like DirectQuery, Import, and Live Connection are essential for managing data access and performance. Interview questions often focus on these topics to assess your ability to connect and optimize data sources effectively. Familiarity with these concepts ensures seamless data integration, a critical skill for any Power BI professional. This section helps you master the fundamentals of data connectivity, a key area in Power BI interviews.

3.3 Building Blocks of Power BI

The building blocks of Power BI include its core components like Power BI Desktop, Service, and Mobile. These tools work together to enable data transformation, analysis, and visualization. Understanding how these elements integrate is crucial for creating effective reports and dashboards. Additionally, the foundation of Power BI relies on data modeling, DAX calculations, and visualizations to present insights clearly. This section delves into the essential parts of Power BI, helping you grasp the framework needed to build and share impactful business intelligence solutions. Mastering these fundamentals is key to excelling in Power BI development and analysis.

Advanced Power BI Topics

This section explores advanced Power BI features like data modeling, DAX formulas, Power Query, and AI integration, essential for expert-level analytics and problem-solving.

4.1 Data Modeling in Power BI

Data modeling in Power BI is crucial for creating efficient and scalable datasets. It involves designing tables, relationships, and measures to optimize performance and accuracy. Key aspects include understanding data granularity, creating star schemas, and using DAX calculations. Proper data modeling ensures data integrity and supports advanced analytics. This section covers best practices for structuring data, managing relationships, and optimizing models for performance. Mastering these techniques is essential for delivering actionable insights and supporting complex business scenarios effectively.

4.2 DAX Formulas and Calculations

DAX (Data Analysis Expressions) is a powerful formula language used in Power BI for calculations and data analysis; It enables the creation of measures, calculated columns, and tables to derive insights. Common functions include SUM, AVERAGE, and CALCULATE, which handle aggregation and context manipulation. Understanding row vs. filter context is vital for accurate calculations. Best practices involve optimizing DAX for performance, avoiding circular references, and using variables effectively. Mastering DAX is essential for creating dynamic and scalable models, ensuring precise and actionable data-driven decisions in Power BI reports and dashboards.

4.3 Power Query and Data Transformation

Power Query is a powerful tool in Power BI for data transformation and preparation. It allows users to clean, merge, and shape datasets from various sources. Key functions include data loading, transforming, and merging, enabling the creation of structured data models. Understanding M language is essential for advanced transformations. Best practices involve optimizing queries for performance and minimizing data volume. Troubleshooting common issues like data type mismatches and null values is crucial. Mastery of Power Query ensures robust and scalable data preparation, enhancing overall Power BI model efficiency and accuracy for comprehensive data analysis and visualization.

Power BI Visualization Best Practices

Effective visualizations simplify data complexity, ensuring clarity and readability. Use intuitive charts, consistent colors, and clear labels. Optimize dashboards for interactivity with filters and slicers to enhance user insights.

5.1 Creating Effective Dashboards

Designing effective dashboards in Power BI requires a focus on clarity and user experience. Start by defining clear objectives and ensuring data is organized logically. Use intuitive visuals like bar charts, line graphs, and maps to simplify complex data. Avoid clutter by limiting the number of elements and using consistent colors and fonts. Ensure interactivity with filters and slicers, allowing users to drill down into details. Optimize layouts for readability on both desktop and mobile devices. Regularly test and refine your dashboards based on user feedback to maximize their impact and utility.

5.2 Using Filters and Slicers

Filters and slicers are essential for enhancing interactivity in Power BI dashboards. Filters allow users to narrow down data based on specific criteria, while slicers provide a visual way to segment data. Use filters to restrict data to a particular range or category, and slicers to enable users to select specific values dynamically. Implementing them effectively improves user experience by making reports more intuitive and actionable. For example, use dropdowns or checkboxes for filters and interactive buttons for slicers. This ensures users can easily drill down into relevant data without overwhelming them with information.

5.3 Design Principles for Reports

Designing effective Power BI reports involves balancing aesthetics and functionality. Use consistent color schemes, clear typography, and logical layouts to ensure readability. Avoid clutter by prioritizing key metrics and visuals. Implement intuitive navigation and interactive elements like tooltips for deeper insights. Adhere to best practices for data visualization, such as using appropriate chart types for specific data. Ensure accessibility by providing alt text for visuals and using high-contrast colors. These principles enhance user experience and communicate data effectively. Demonstrating a strong understanding of these principles in an interview showcases your ability to create impactful and user-friendly reports.

Scenario-Based Power BI Interview Questions

Scenario-based questions assess your ability to apply Power BI in real-world challenges. Examples include designing dashboards for specific business needs or troubleshooting data visualization issues.

6.1 Example Projects and Challenges

This section provides real-world examples of Power BI projects, such as creating sales dashboards or analyzing customer trends. It highlights common challenges, like data inconsistency or performance issues, and offers practical solutions. Readers learn how to handle complex datasets, optimize reports, and deliver actionable insights. These examples simulate actual interview scenarios, helping you demonstrate problem-solving skills and technical expertise. By reviewing these case studies, you can confidently discuss your approach to overcoming challenges and achieving business impact through Power BI.

6.2 Solving Real-World Business Problems

Power BI is widely used to address real-world business challenges, such as sales forecasting, customer segmentation, and operational efficiency. This section explores how Power BI tools can transform raw data into actionable insights, enabling organizations to make informed decisions. By leveraging data visualization and analytics, professionals can identify trends, optimize processes, and drive growth. Examples include improving supply chain management or enhancing customer satisfaction through data-driven strategies. Mastering these techniques demonstrates your ability to solve complex problems, making you a valuable asset in any organization.

6.3 Impact of Power BI on Business Decision-Making

Power BI empowers businesses to make data-driven decisions by transforming complex data into actionable insights. Its interactive dashboards and real-time analytics enable organizations to respond swiftly to market changes. By providing a unified view of data, Power BI enhances collaboration and aligns decision-making across departments. This leads to improved operational efficiency, better strategic planning, and a competitive edge in the market. Ultimately, Power BI plays a pivotal role in driving informed decision-making, helping businesses achieve their goals effectively.

Power BI Tools and Features

Power BI offers tools like Power Pivot, Power Map, and Power Query, enabling advanced data analysis and visualization. It also supports collaboration and AI integration for informed decision-making.

7.1 Power Pivot and Power Map

Power Pivot enhances data modeling by enabling advanced calculations and data analysis. Power Map visualizes geospatial data, transforming datasets into interactive 3D maps. Together, they provide powerful insights, making complex data accessible and actionable for decision-making.

7.2 Advanced Analytics and AI Integration

Power BI integrates advanced analytics and AI to uncover deeper insights. AI-driven features like automated insights and predictive analytics enable users to forecast trends and identify patterns. Machine learning integration enhances data modeling, while natural language querying simplifies complex analysis. These tools empower users to make data-driven decisions, transforming raw data into actionable strategies. The combination of advanced analytics and AI capabilities positions Power BI as a cutting-edge solution for modern business intelligence needs.

7.3 Collaboration and Sharing in Power BI

Power BI facilitates seamless collaboration and sharing, enabling teams to work together effectively. Features like shared dashboards, workspaces, and permissions ensure data accessibility and security. Users can publish reports to the Power BI Service, share insights via links or emails, and collaborate in real-time. Integration with Microsoft Teams enhances teamwork, while version control and comments streamline feedback. These features make Power BI an ideal platform for fostering collaboration and driving informed decision-making across organizations.

Behavioral and Technical Questions

This section covers common behavioral questions, problem-solving techniques, and technical assessments. It helps candidates showcase their analytical skills, teamwork, and ability to handle real-world challenges effectively.

8.1 Common Behavioral Questions

Behavioral questions assess your problem-solving skills, teamwork, and communication. Examples include describing a successful Power BI project, challenges faced, and your role in solving them. Employers seek candidates who can articulate their approach to data visualization, collaboration, and decision-making. Be prepared to discuss specific scenarios where you handled complex data, optimized performance, or translated insights into actionable strategies. Highlighting your adaptability, creativity, and ability to work under pressure is crucial. These questions help employers evaluate how you align with their team and business goals, ensuring you can thrive in real-world analytical environments and contribute effectively to their organization.

8.2 Technical Assessments and Problem-Solving

Technical assessments evaluate your hands-on expertise in Power BI, focusing on data modeling, DAX formulas, and Power Query. Expect scenario-based questions, such as optimizing data models or troubleshooting performance issues. Problem-solving exercises may involve creating visualizations or writing DAX calculations. Demonstrating logical thinking and proficiency in handling complex datasets is key. Be ready to explain your approach to common challenges, like data transformation or connectivity issues. Practice with real-world examples and mock interviews will help you confidently showcase your technical skills and ability to solve practical business problems effectively.

8.3 Tips for Acing the Interview

To excel in your Power BI interview, prepare thoroughly by practicing mock interviews and reviewing common questions. Demonstrate confidence and clarity in explaining your thought process. Highlight your problem-solving skills and experience with real-world projects. Showcase your technical expertise in data modeling, DAX, and Power Query. Emphasize soft skills like communication and teamwork; Stay updated on the latest Power BI features and best practices. Continuous learning and a proactive attitude will set you apart. Use storytelling techniques to illustrate your achievements and how they align with the role. This holistic approach will help you make a lasting impression.

Mastering Power BI requires continuous learning and practice. Utilize the complete guide PDF for expert tips and resources to advance your skills and secure your dream role.

9.1 Summary of Key Concepts

The guide covers essential Power BI concepts, including data modeling, DAX formulas, and visualization best practices. It emphasizes practical applications and real-world scenarios, ensuring a holistic understanding of Power BI tools and techniques. By mastering these concepts, professionals can effectively analyze data, create impactful reports, and drive informed decision-making. The comprehensive approach ensures readiness for various interview questions, from basic to advanced levels, making it an invaluable resource for aspiring Power BI professionals.

9.2 Continuous Learning and Growth

Continuous learning is crucial for mastering Power BI, as the tool evolves with new features and updates. Professionals must stay informed about best practices, advanced analytics, and emerging trends. Leveraging resources like Microsoft’s official documentation, community forums, and training courses can enhance skills. Regular hands-on practice and real-world projects reinforce knowledge. Networking with peers and mentors provides valuable insights and tips. Investing time in continuous learning ensures adaptability and growth, keeping you competitive in the dynamic field of data analytics and visualization.

9.3 Final Tips for Success

To excel in your Power BI interview, stay confident and passionate about your work. Highlight your hands-on experience and problem-solving skills. Research the company’s needs to align your responses with their goals. Showcase your ability to translate data into actionable insights. Practice answering behavioral and technical questions, and review common Power BI interview queries. Emphasize soft skills like communication and collaboration, as they are equally important. Stay updated with the latest Power BI features and trends. Continuous learning and a proactive approach will set you apart and pave the way for a successful career in data analytics.

PDF

sai charitra book pdf

Sai Charitra‚ a revered spiritual text‚ chronicles the life‚ teachings‚ and miracles of Sai Baba of Shirdi. Comprising 53 chapters‚ it is a divine guide for devotees‚ offering insights into faith‚ devotion‚ and spiritual growth. The book‚ written by Hemadpant‚ is widely available in PDF format for easy access.

1.1 Overview of Sai Charitra

Sai Charitra‚ a sacred text dedicated to the life and teachings of Shirdi Sai Baba‚ is a comprehensive guide for spiritual seekers. Written by Hemadpant‚ a devout follower‚ the book contains 53 chapters that detail Sai Baba’s miracles‚ philosophy‚ and divine experiences. It serves as a source of inspiration‚ fostering faith and devotion in readers.

The text emphasizes core principles such as love‚ forgiveness‚ and self-surrender‚ reflecting Sai Baba’s universal teachings. Each chapter vividly describes his interactions with devotees‚ showcasing his compassion and wisdom. The book is considered a holy scripture by millions‚ believed to impart spiritual growth and peace;

Available in PDF format‚ Sai Charitra is accessible to a global audience‚ ensuring its timeless message reaches every corner of the world. Its digital version retains the original essence‚ making it easier for modern readers to connect with Sai Baba’s profound teachings. This text remains a cornerstone of spiritual literature‚ guiding devotees on their journey toward enlightenment.

1.2 Historical Background

The Sai Charitra‚ a sacred text detailing the life and teachings of Shirdi Sai Baba‚ has a rich historical background rooted in the late 19th and early 20th centuries. Sai Baba‚ a revered spiritual leader‚ lived in Shirdi‚ a small village in Maharashtra‚ India‚ and his divine presence attracted countless devotees.

The book was originally written in Marathi by Hemadpant‚ a dedicated follower of Sai Baba‚ between 1912 and 1913. Hemadpant meticulously documented the miracles‚ teachings‚ and daily life of Sai Baba‚ creating a comprehensive account that became the foundation of Sai Charitra. The text was later translated into English and other languages‚ ensuring its message reached a global audience.

Historically‚ Sai Charitra gained prominence as a spiritual guide after Sai Baba’s passing in 1918. Devotees considered it a holy scripture‚ believing it carried Baba’s blessings and wisdom. Over time‚ the text has been widely circulated‚ with its PDF version becoming a popular choice for modern readers seeking convenience and accessibility.

The historical significance of Sai Charitra lies in its ability to preserve Sai Baba’s teachings for future generations. It serves as a bridge between the past and present‚ ensuring his message of love‚ compassion‚ and spiritual enlightenment endures. The book’s enduring popularity is a testament to its profound impact on the lives of millions worldwide.

The Author of Sai Charitra

Hemadpant‚ a devoted disciple of Sai Baba‚ authored the Sai Charitra. His meticulous documentation of Sai Baba’s life‚ teachings‚ and miracles laid the foundation for this sacred text. Hemadpant’s work remains a cornerstone of Sai Baba’s legacy‚ inspiring millions worldwide.

2.1 Hemadpant and His Role

Hemadpant‚ whose real name was Govind Raghunath Dabholkar‚ was a devoted follower of Sai Baba and the author of the revered book Sai Charitra. He was a school teacher by profession but dedicated his life to chronicling the life‚ teachings‚ and miracles of Sai Baba. Hemadpant’s deep devotion and meticulous documentation made him the ideal chronicler of Sai Baba’s divine journey. He spent years gathering stories‚ experiences‚ and testimonies from Sai Baba’s devotees‚ ensuring the authenticity of the accounts. His role extended beyond that of a writer; he was a faithful disciple who sought to preserve Sai Baba’s legacy for future generations.

The Sai Charitra was originally written in Marathi and later translated into various languages. Hemadpant’s work is considered the most authoritative source of information on Sai Baba’s life‚ as it was written during Sai Baba’s lifetime and with his blessings. Hemadpant’s dedication and faith in Sai Baba shine through the pages of Sai Charitra‚ making it a timeless spiritual guide. His efforts ensured that Sai Baba’s teachings and miracles are accessible to millions of devotees worldwide‚ even in the form of a PDF‚ which has made the book more accessible in the digital age.

Content and Structure of Sai Charitra

Sai Charitra‚ comprising 53 chapters‚ meticulously details Sai Baba’s life‚ teachings‚ and miracles. Each chapter focuses on specific events‚ emphasizing faith‚ patience‚ and self-surrender. The book is divided into parts‚ each highlighting key themes and divine experiences‚ offering a comprehensive understanding of Sai Baba’s spiritual message. The PDF version maintains this structure‚ ensuring accessibility.

3.1 Chapters and Their Significance

The Sai Charitra is divided into 53 chapters‚ each carrying profound spiritual significance and detailing various aspects of Sai Baba’s life and teachings. These chapters are not merely narratives but serve as a divine guide for seekers of truth. Each chapter focuses on specific events‚ miracles‚ and lessons imparted by Sai Baba‚ offering insights into faith‚ devotion‚ and self-realization.

Chapters 16 and 17 are particularly revered‚ as they delve into the deeper philosophical and spiritual aspects of Sai Baba’s teachings. These sections emphasize the importance of surrendering to the divine and cultivating inner peace. The chapters are structured to inspire reflection and introspection‚ making the text accessible to readers from all walks of life.

The PDF version of Sai Charitra retains the original structure and essence of the book‚ ensuring that devotees can conveniently access and study the sacred text. The chapters are designed to be read sequentially‚ allowing readers to gradually absorb the wisdom and spiritual truths embedded within. This systematic approach makes the Sai Charitra a comprehensive and timeless spiritual resource.

Moreover‚ the chapters highlight Sai Baba’s universal message of love‚ compassion‚ and equality. They underscore the importance of living a simple‚ pure life and trusting in the divine plan. Through these chapters‚ readers gain a deeper understanding of Sai Baba’s mission and the transformative power of his teachings.

3.2 Key Themes and Teachings

The Sai Charitra is a treasure trove of spiritual wisdom‚ imparting timeless teachings that guide devotees on their journey toward self-realization and divine connection. Central to the text is the emphasis on unwavering faith in the divine and the importance of surrendering one’s ego and desires to the will of God.

The book underscores the significance of living a life rooted in truth‚ compassion‚ and simplicity. Sai Baba’s teachings advocating for love and equality are recurring themes‚ reminding readers of the inherent unity of all beings. The text also highlights the transformative power of prayer and the necessity of cultivating inner peace amidst life’s challenges.

One of the most profound themes is the concept of “Sabka Malik Ek‚” or the belief that there is only one God governing the universe. This universal message transcends religious boundaries‚ making Sai Charitra a text revered by people of diverse faiths. The teachings encourage devotees to embrace humility‚ patience‚ and forgiveness‚ laying the foundation for a harmonious and balanced life.

The PDF version of Sai Charitra preserves these teachings in their original form‚ ensuring that contemporary readers can access and reflect on Sai Baba’s timeless wisdom. The text serves as both a spiritual guide and a source of solace‚ offering practical insights for navigating the complexities of modern life while staying rooted in spiritual principles.

The Spiritual Significance of Sai Charitra

Sai Charitra is a sacred text revered for its profound spiritual insights and divine teachings. It serves as a guide for devotees seeking enlightenment‚ emphasizing faith‚ surrender‚ and self-realization. The book’s miracles and experiences deepen spiritual connection‚ offering solace and inspiration to millions worldwide.

4.1 Teachings and Philosophy

The teachings and philosophy of Sai Charitra revolve around universal truths and spiritual principles. Sai Baba’s core message emphasizes faith‚ patience‚ and self-surrender to the divine. The book underscores the importance of inner peace‚ love‚ and compassion‚ teaching devotees to cultivate these qualities in daily life. Sai Baba’s philosophy is rooted in the unity of all religions‚ advocating for harmony and acceptance. The text also highlights the significance of detachment from materialistic desires‚ encouraging followers to focus on spiritual growth and service to humanity; Through parables and real-life examples‚ Sai Charitra illustrates the power of devotion and the miracles that arise from unwavering faith. The teachings are simple yet profound‚ making them accessible to people from all walks of life. The book serves as a spiritual guide‚ offering solace‚ wisdom‚ and inspiration to those seeking enlightenment. Its timeless philosophy continues to resonate with millions‚ making Sai Charitra a cherished text for spiritual seekers worldwide.

4.2 Miracles and Divine Experiences

Sai Charitra is replete with accounts of Sai Baba’s miraculous deeds and divine experiences‚ which have left an indelible mark on the hearts of his devotees. The book vividly describes how Sai Baba‚ through his supernatural powers‚ healed the sick‚ restored vision to the blind‚ and even brought the dead back to life. These miracles were not mere spectacles but served as manifestations of his divine grace‚ reinforcing faith and inspiring self-surrender among his followers.

One of the most notable miracles recounted in Sai Charitra is the incident where Sai Baba transformed water into oil to light lamps in the temple. This act of divine intervention showcased his ability to transcend the laws of nature and demonstrated his omnipotence. Similarly‚ his ability to appear in multiple places at once and foresee future events further highlighted his supernatural prowess.

The book also narrates the profound spiritual experiences of Sai Baba’s devotees‚ who often reported receiving visions‚ guidance‚ and solace through his grace. These divine experiences were transformative‚ leading many to embrace a life of devotion and service. Sai Charitra thus serves as a testament to the extraordinary life of Sai Baba‚ blending the miraculous with the mundane to inspire spiritual growth and faith in the divine.

Through these accounts‚ Sai Charitra not only celebrates Sai Baba’s divine interventions but also underscores the importance of trust and surrender in achieving spiritual enlightenment. The miracles and divine experiences documented in the book continue to inspire and uplift millions of devotees worldwide.

Sai Charitra Book in PDF Format

The Sai Charitra book is widely available in PDF format‚ offering devotees easy access to Sai Baba’s teachings and miracles. The PDF version ensures convenience‚ allowing readers to explore the spiritual text anytime‚ anywhere. It preserves the original content’s sanctity and depth‚ making it a popular choice for digital readers.

5.1 Availability and Download Options

The Sai Charitra book in PDF format is widely available for download from various sources‚ ensuring accessibility for devotees worldwide. Official websites of the Shri Saibaba Sansthan Trust‚ Shirdi‚ offer free downloads‚ making it convenient for followers to access the holy text. Additionally‚ third-party spiritual and religious websites provide links to download the PDF version‚ often categorized by language‚ such as English‚ Marathi‚ or Telugu.

Devotees can also find the Sai Charitra PDF on platforms like Google Drive or Dropbox‚ shared by communities or individuals. Some websites offer multiple formats‚ including DOC‚ allowing users to choose their preferred file type. The PDF version is particularly popular due to its ease of reading on mobile devices and computers. Furthermore‚ many online libraries and e-book platforms host the Sai Charitra‚ ensuring its widespread availability. For those seeking a physical copy‚ the book is also available at Shirdi’s Sansthan Trust outlets and other spiritual centers. Overall‚ the Sai Charitra in PDF format remains a cherished resource‚ bridging the gap between technology and spirituality for millions of Sai Baba devotees globally.

5.2 Features of the PDF Version

The PDF version of Sai Charitra offers a seamless and enriching reading experience‚ making it a popular choice among devotees. One of its key features is its compatibility with various devices‚ including smartphones‚ tablets‚ and computers‚ allowing readers to access the text anytime and anywhere. The PDF format ensures that the layout and formatting remain consistent across all devices‚ preserving the spiritual essence of the content.

Another notable feature is the ability to easily navigate through the chapters and verses‚ with many versions including bookmarks or hyperlinks for quick access. The text is typically presented in clear‚ readable fonts‚ ensuring that the teachings of Sai Baba are accessible to all. Additionally‚ the PDF version often includes spiritual chants‚ hymns‚ and prayers‚ enhancing the devotional experience for readers.

Some versions of the Sai Charitra PDF also offer interactive elements‚ such as search functionality‚ allowing users to quickly locate specific chapters‚ verses‚ or keywords. This feature is particularly useful for those seeking guidance or inspiration on particular aspects of life. Furthermore‚ the PDF format enables users to highlight and annotate important passages‚ facilitating deeper reflection and study.

Overall‚ the PDF version of Sai Charitra is a convenient‚ user-friendly‚ and spiritually enriching resource for devotees‚ blending tradition with modern technology to spread Sai Baba’s timeless teachings.

Translations and Versions of Sai Charitra

Sai Charitra‚ originally written in Marathi by Hemadpant‚ has been translated into numerous languages to spread Sai Baba’s teachings globally. The most popular versions include English‚ Hindi‚ Telugu‚ Tamil‚ and Kannada‚ ensuring accessibility for devotees across linguistic and cultural boundaries. These translations maintain the spiritual essence and authenticity of the original text‚ making it a universal guide for spiritual seekers.

Besides the original Marathi version‚ the English translation by Shri N.V. Gunaji is widely read and appreciated for its clarity and faithfulness to the source material. Additionally‚ there are concise versions of Sai Charitra‚ designed for those seeking a shorter yet meaningful reading experience. These adaptations retain the core teachings and miracles of Sai Baba‚ making them ideal for daily reading or parayan (devotional reading).

Regional variations and interpretations of Sai Charitra also exist‚ reflecting the diverse cultural and devotional practices of Sai Baba’s followers. For instance‚ the Telugu version is particularly popular in southern India‚ while the Hindi version caters to North Indian devotees. Furthermore‚ digital versions and apps now offer multiple language options‚ enhancing accessibility for a global audience.

These translations and versions underscore the timeless appeal of Sai Charitra‚ ensuring that Sai Baba’s message of love‚ compassion‚ and self-realization continues to inspire millions worldwide.

battery tender plus manual

Technical Specifications Summary

The Battery Tender Plus supports 12V, 8V, or 6V battery charging with a 1.25A output current. It operates on 120V AC input at 60Hz frequency for reliable performance.

1.1 Battery Voltage Options

The Battery Tender Plus is designed to accommodate multiple battery voltage needs, supporting 12V, 8V, and 6V systems. This flexibility allows users to charge a variety of lead-acid batteries for vehicles, motorcycles, and marine applications. The charger automatically adjusts its output to match the connected battery voltage, ensuring optimal charging without manual configuration. For 12V batteries, the standard model (PN 021-0128) is commonly used, while the 8V model (PN 021-0152) is ideal for specialized applications. The 6V option is perfect for older vehicles or classic cars. This versatility makes the Battery Tender Plus a universal solution for maintaining different battery types efficiently.

1.2 Output Current and Voltage

The Battery Tender Plus delivers a consistent output current of 1.25 amps, ensuring a safe and efficient charging process for lead-acid batteries. The output voltage automatically adjusts to the battery’s voltage requirements, supporting 12V, 8V, and 6V systems. This feature prevents overcharging and maintains the battery’s health. The charger’s regulated output voltage ensures stability during all charging phases, from bulk to float mode. With a maximum output voltage of 12 volts, it is suitable for most automotive and marine applications. The 1.25-amp current is designed for faster charging compared to lower-amperage models, making it ideal for maintaining batteries of various capacities. This balance of current and voltage ensures reliable performance across different battery types.

1.3 Input Voltage and Frequency

The Battery Tender Plus operates on a standard 120V AC input voltage with a frequency of 60Hz, making it compatible with typical household electrical outlets. This ensures easy and convenient charging in most environments. The charger is designed to handle minor voltage fluctuations and includes built-in protection against power surges, ensuring safe and reliable operation. The 60Hz frequency aligns with standard electrical systems in the United States and Canada, providing consistent performance. The AC input is designed for straightforward connection to a wall outlet, and the charger automatically adjusts to the input voltage, ensuring optimal charging without manual intervention. This feature enhances usability and safety for users.

Installation and Mounting Instructions

The Battery Tender Plus charger includes a NEMA 5-15 plug for easy AC connection. Install in a well-ventilated area, ensuring the charger is securely mounted to prevent movement during operation. Always follow the connection diagram provided in the manual for proper setup and safety.

2.1 Connection Diagram

The connection diagram illustrates the proper setup for the Battery Tender Plus charger. It shows the 12V Battery Tender Plus (PN 021-0128) connected to a fused ring terminal cable assembly (PN 081-0069-6) and a 12V lead-acid battery. The exposed pin on the charger is positive, while the covered socket is also positive. The negative (black) clip should be connected to the negative terminal of the battery. A detailed wiring layout ensures safe and correct connections. Always refer to the diagram to avoid incorrect connections, which could damage the charger or battery. Proper installation is crucial for safe and efficient charging. Follow the diagram carefully to prevent electrical hazards.

2.2 Mounting Considerations

Proper mounting of the Battery Tender Plus ensures safe and efficient operation. The charger should be installed in a well-ventilated area to prevent overheating. Use the provided mounting hardware to secure it firmly to a stable surface, avoiding vibration. Keep it away from flammable materials and direct sunlight. Ensure all connections are secure and follow the recommended torque specifications. The charger’s AC power cord features a NEMA 5-15 plug, requiring a grounded outlet. Mount the charger in an upright position to prevent moisture ingress. Always adhere to the manufacturer’s guidelines for optimal performance and longevity of the device. Correct mounting enhances safety and prevents potential electrical hazards. Regularly inspect the installation for any signs of wear or damage.

2.3 Safety Precautions

Always disconnect the battery from the charger before making any adjustments or inspections. Avoid touching electrical components with wet hands or while standing on conductive surfaces. Keep the charger away from children and pets to prevent accidental tampering. Never charge a damaged or leaking battery, as it may release harmful gases or cause explosions. Ensure proper ventilation in the charging area to prevent hydrogen gas buildup. Follow the manual’s guidelines for connecting and disconnecting cables to avoid sparks. Use protective eyewear when working with batteries and chargers. Store the charger in a cool, dry place, away from flammable materials. Regularly inspect cables and connections for wear or damage. Always adhere to these precautions to ensure safe and reliable operation.

User Instructions

Connect the charger to the battery, ensuring correct polarity; Plug into AC power and monitor the LED indicators for charging status. The charger automatically manages the process.

3.1 Connecting the Charger to the Battery

To connect the Battery Tender Plus to your battery, first ensure the charger is unplugged from AC power. Verify the battery type (12V, 8V, or 6V) matches the charger settings. Locate the positive (+) and negative (-) terminals on the battery. Attach the positive (red) clamp to the positive terminal and the negative (black) clamp to the negative terminal. Ensure the connections are secure to avoid sparks. Avoid cross-connecting or reversing polarity, as this can damage the battery or charger. Once connected, plug the charger into a grounded AC outlet. The charger will automatically detect the battery voltage and initiate charging. Always monitor the LED indicators for charging status updates.

3.2 Connecting to AC Power

To connect the Battery Tender Plus to AC power, locate a grounded 120V AC outlet. Ensure the outlet matches the charger’s NEMA 5-15 plug. Plug the charger into the outlet, making sure it is securely connected. Verify the AC power cord is undamaged and properly seated in both the charger and the outlet. Avoid using extension cords to maintain safe and reliable operation. Once connected, the charger will automatically power on and begin monitoring the battery. The LED status indicators will illuminate to confirm AC power is available. Always ensure the charger is set to the correct battery voltage before leaving it unattended.

3.3 Automatic Charging Process

The Battery Tender Plus features a fully automatic charging process designed to optimize battery health. Upon connection, it initializes a diagnostic check to assess the battery’s condition. The charger then enters bulk charge mode, delivering the maximum safe current to rapidly replenish the battery. Once the battery reaches a predetermined voltage, it switches to absorption mode, refining the charge to ensure full capacity. Finally, it transitions to float maintenance mode, where it sustains the battery at 100% charge without overcharging. The LED indicators provide real-time feedback on the charging progress and mode. This intelligent process ensures efficient, safe, and maintenance-free charging for all compatible batteries.

Safety Instructions and Precautions

Always avoid sparks near batteries to prevent explosions. Wear protective eyewear and gloves when handling the charger and battery. Ensure proper ventilation to avoid hydrogen gas buildup.

4.1 Warning and Caution Labels

The Battery Tender Plus manual emphasizes critical safety labels to ensure safe operation. These labels highlight risks such as explosion, electrical shock, or fire if improper practices occur. Key warnings include avoiding metal tools near batteries to prevent sparks, ensuring correct polarity connections, and not overcharging. Caution labels stress the importance of proper ventilation to prevent hydrogen gas buildup and advise against discharging batteries below 3 volts. Users are also reminded to avoid short-circuiting the battery or charger, as this can cause serious damage or injury. Always refer to the manual for detailed safety guidelines to prevent potential hazards during charging.

4.2 Handling the Charger and Battery

Proper handling of the Battery Tender Plus and the battery is essential for safe operation. Avoid using metal tools near the battery terminals to prevent sparks, which could ignite hydrogen gas. Always ensure the charger is disconnected from AC power before connecting or disconnecting the battery. Verify correct polarity by matching the positive (red) and negative (black) clips to the corresponding terminals. Inspect the cables and connectors for damage before use. Never handle the battery or charger in a way that could cause short-circuiting. Store the charger in a cool, dry place, away from flammable materials. Keep the battery upright and secure to prevent acid spills during charging.

4.3 Avoiding Electrical Hazards

To prevent electrical hazards, always ensure the Battery Tender Plus is used in a well-ventilated area, free from moisture and flammable materials. Avoid overcharging, as it can cause battery damage or gas buildup. Never touch electrical components with wet hands or while standing in water. Keep children away from the charger and battery. If the charger or battery shows signs of damage, discontinue use immediately. Properly insulate all connections to prevent short circuits. Follow the manufacturer’s guidelines for charging times and voltage settings. Regularly inspect cables and connectors for wear. Never modify the charger or battery, as this could lead to dangerous malfunctions. Always unplug the charger from AC power before servicing.

Troubleshooting Checklist

Check for loose connections, damaged cables, or incorrect voltage settings. Verify AC power availability and ensure the battery voltage is above 3 volts for proper charging.

5.1 Common Issues and Remedies

Common issues with the Battery Tender Plus include no AC power, low battery voltage, or faulty connections. Remedies involve checking the AC outlet, ensuring correct voltage settings, and inspecting cables for damage. If the battery voltage is below 3 volts, it may require a boost charge. Additionally, ensure the charger is properly connected to the battery terminals. If issues persist, refer to the troubleshooting checklist or contact customer support for assistance. Always follow safety guidelines to avoid electrical hazards. Regular maintenance and proper storage can prevent many of these common problems.

5.2 Battery Voltage Checks

Battery voltage checks are essential for ensuring proper charging and maintenance. Measure the battery voltage using a digital voltmeter. Disconnect the charger before testing to get an accurate reading. For a fully charged 12V battery, the voltage should be approximately 12.7V. If the voltage is below 12V, the battery may need recharging. For 6V batteries, the fully charged voltage is around 6.3V. If the voltage is significantly lower, the battery may not be chargeable; Always follow safety precautions to avoid short circuits or electrical shocks. Regular voltage checks help maintain battery health and ensure optimal performance.

5.3 Charger Status Indicators

The Battery Tender Plus features two status indicators: a red and a green light. These lights provide real-time feedback on the charger’s operating mode and the battery’s condition. The red light indicates the bulk charge mode, where the battery is being charged at the maximum rate. Once the battery reaches a certain voltage, the charger automatically switches to absorption or float mode, and the green light illuminates. The green light also signifies that the battery is fully charged and being maintained. If both lights flash, it may indicate an issue such as a short circuit or a deeply discharged battery. Always refer to the manual for specific troubleshooting guidance.

Charging Process and Modes

The Battery Tender Plus operates in three primary modes: bulk, absorption, and float. It automatically switches between modes to ensure optimal charging and battery maintenance.

6.1 Bulk Charge Mode

The Battery Tender Plus begins charging in Bulk Charge Mode, delivering a high current to rapidly replenish the battery. This mode is designed to charge the battery to approximately 80% of its capacity, ensuring efficient energy replenishment. It is the initial phase of the charging process, focusing on restoring the battery’s voltage quickly. The charger automatically regulates the current to prevent overheating and damage, making it suitable for deeply discharged batteries. This mode is crucial for recovering lost charge and preparing the battery for the subsequent absorption and float stages, ensuring optimal performance and longevity.

6.2 Absorption and Float Maintenance

Following the Bulk Charge Mode, the Battery Tender Plus transitions to Absorption Mode, refining the charge to reach 100% capacity. It maintains a constant voltage to stabilize the battery, ensuring all cells are evenly charged. Once fully charged, the charger automatically switches to Float Maintenance Mode. This mode reduces the charge current to a trickle, preserving battery health by preventing overcharging. The float stage is essential for long-term battery maintenance, keeping it ready for use without degradation. This dual-stage process ensures the battery remains in optimal condition, whether in storage or frequent use, extending its lifespan and performance reliability.

6.3 Automatic Switching Between Modes

The Battery Tender Plus features automatic mode switching, ensuring seamless transitions between Bulk, Absorption, and Float Charging. This intelligent system detects the battery’s state of charge and voltage, adjusting the charging process accordingly. When the battery reaches full charge, the charger automatically shifts to Float Mode to maintain optimal voltage levels without overcharging.

This advanced technology ensures the battery is always charged efficiently and safely, preventing damage from overcharging. The automatic mode switching is controlled by a built-in microprocessor, which continuously monitors and adjusts the charging parameters for precise and reliable performance. This feature makes the Battery Tender Plus ideal for both frequent and seasonal battery use, ensuring long-term battery health and reliability.

Maintenance and Care Tips

Regularly clean the charger and connections to ensure proper functionality. Store the charger in a cool, dry place when not in use. Inspect cables and plugs for wear and tear, replacing them if damaged. Avoid exposure to extreme temperatures or moisture to maintain optimal performance and longevity of the Battery Tender Plus charger.

7.1 Cleaning the Charger

Regular cleaning of the Battery Tender Plus charger is essential for maintaining its efficiency and preventing damage. Use a soft, dry cloth to wipe down the exterior, removing any dust or debris. For tougher stains, dampen the cloth with water, but avoid harsh chemicals or abrasive materials that could scratch the surface. Never submerge the charger in water or expose it to excessive moisture. Clean the DC and AC connectors gently with a cotton swab to ensure proper conductivity. Avoid using aerosol cleaners or solvents, as they may damage the casing or internal components. Regular cleaning ensures optimal performance and extends the lifespan of the charger.

7.2 Storing the Charger

When storing the Battery Tender Plus charger, ensure it is placed in a cool, dry location away from direct sunlight and moisture. Avoid extreme temperatures, as this can damage the internal components. Store the charger in its original packaging or a protective cover to prevent dust accumulation. Keep the charger away from flammable materials and out of reach of children. Do not store the charger while it is connected to a power source or battery. Before long-term storage, ensure the charger is clean and dry. Proper storage will maintain the charger’s performance and extend its lifespan. Always refer to the manual for specific storage recommendations.

7.4 Checking for Wear and Tear

Regularly inspect the Battery Tender Plus charger for signs of wear and tear. Check the AC power cord and DC output cables for fraying, cuts, or damage. Inspect the connectors for corrosion or bent pins. Ensure all labels and warning signs are legible and intact. Examine the housing for cracks or dents that could compromise safety. If any damage is found, discontinue use and contact customer support. Clean the charger periodically with a soft cloth to prevent dirt buildup. Proper maintenance ensures optimal performance and longevity of the charger, while also adhering to safety guidelines outlined in the manual.

Additional Features

The Battery Tender Plus features LED status indicators for charge monitoring, float charging mode for battery maintenance, and compatibility with 12V, 6V, and 8V batteries.

8.1 LED Status Indicators

The Battery Tender Plus features two LED status indicators: one red and one green. These LEDs provide real-time feedback on the charger’s operating mode and the battery’s condition. The red LED illuminates during the bulk charging phase, indicating that the charger is actively supplying power to the battery. Once the battery reaches a full charge, the red LED turns off, and the green LED lights up, signaling that the charger has switched to float maintenance mode. This visual feedback system ensures users can monitor the charging process effortlessly without needing to check the battery manually. The LEDs are a key feature for ensuring optimal battery health and safe charging practices.

8.2 Float Charging Mode

The Battery Tender Plus features an automatic float charging mode designed to maintain a battery at 100% charge without overcharging. Once the bulk charging phase is complete, the charger transitions to float mode, reducing the output voltage and current to a safe, maintenance level. This ensures the battery remains fully charged and prevents degradation from overcharging. The float mode is ideal for long-term storage or for batteries that are not in frequent use. It also helps extend the battery’s lifespan by preventing overheating and chemical degradation. This feature makes the Battery Tender Plus a convenient and reliable option for maintaining batteries in optimal condition.

8.3 Compatibility with Different Battery Types

The Battery Tender Plus is designed to be compatible with a variety of battery types, ensuring versatility for different applications. It supports 12V, 8V, and 6V batteries, making it suitable for lead-acid, flooded, AGM, and gel cell batteries. This wide compatibility allows the charger to be used for motorcycles, cars, boats, and other vehicles. The charger automatically adjusts its charging parameters to match the specific battery type, ensuring safe and efficient charging. This adaptability makes the Battery Tender Plus a versatile choice for users with multiple battery-powered devices, providing reliable performance across various battery chemistries and configurations. Its universal compatibility enhances its utility for diverse charging needs.

Warranty and Support Information

The Battery Tender Plus is backed by a limited warranty covering defects in materials and workmanship. For support, visit the official Deltran website or contact customer service for assistance with warranty claims, troubleshooting, or product inquiries. Additional resources, including manuals and FAQs, are available online to ensure optimal product use and maintenance.

9.1 Warranty Terms and Conditions

The Battery Tender Plus is covered by a limited warranty for a period of two years from the date of purchase. The warranty covers defects in materials and workmanship under normal use and conditions. Any claims must be accompanied by proof of purchase. The warranty does not apply to damage caused by misuse, improper installation, or unauthorized modifications. Normal wear and tear, as well as damage from external factors such as accidents or environmental conditions, are excluded. Returns or repairs must be authorized by Deltran Corporation. For detailed warranty terms, refer to the product manual or contact customer support.

9.2 Contacting Customer Support

For assistance with the Battery Tender Plus, customers can contact Deltran Corporation directly. Phone support is available at 386-736-7900, and fax inquiries can be sent to 386-736-0379. Email correspondence should be directed to info@batterytender.com. The company’s website, www.batterytender.com, provides additional resources and contact forms. Customer support is available Monday through Friday, 8:00 AM to 5:00 PM EST. For troubleshooting, warranty claims, or general inquiries, customers are encouraged to have their product serial number and purchase details ready. Representatives are trained to assist with technical support, product information, and repair services.

9.3 Online Resources and Downloads

Deltran Corporation provides comprehensive online resources for the Battery Tender Plus. The official website, www.batterytender.com, offers downloadable PDF manuals, product guides, and firmware updates. Users can access the AAA installation guide and other instructional materials directly from the site. Additional resources include troubleshooting checklists, warranty information, and user FAQs. For convenience, all documentation is available in downloadable PDF format, ensuring easy access and printing. Customers can also find video tutorials and detailed product specifications to enhance their understanding and usage of the Battery Tender Plus charger.

wyoming permit test study guide

Overview of the Wyoming Permit Test

The Wyoming permit test assesses knowledge of traffic laws, road signs, and safe driving practices. It consists of 25 multiple-choice questions, requiring at least 19 correct answers to pass.

What the Wyoming Permit Test Covers

The Wyoming permit test evaluates knowledge of traffic laws, road signs, and safe driving practices. It includes questions about alcohol and drug awareness, sharing the road with other vehicles, and understanding traffic signals. The test also covers defensive driving techniques and basic vehicle safety. All questions are based on the Wyoming Driver’s Manual, ensuring applicants understand state-specific rules and regulations. The test format includes multiple-choice questions designed to assess a candidate’s readiness to operate a vehicle safely and responsibly.

Why Passing the Permit Test is Important

Passing the Wyoming permit test is essential for obtaining a learner’s permit and progressing toward a driver’s license. It ensures knowledge of traffic laws, road signs, and safe driving practices, reducing the risk of accidents and promoting road safety. The test verifies that new drivers understand the rules of the road and are prepared to operate a vehicle responsibly. By passing, individuals demonstrate their commitment to safe driving and gain the freedom to drive independently.

Eligibility Requirements for the Wyoming Permit Test

To be eligible for the Wyoming permit test, applicants must be at least 14 years old with parental consent. A valid ID, proof of residency, and Social Security number are required. A vision test must also be passed.

Age Requirements for Applying

To apply for the Wyoming permit test, applicants must meet specific age requirements. At 14 years old, teens can apply with parental consent. At 16, they can apply independently. A minor under 18 must complete a driver’s education course or supervised driving log. Adults 18 and older may apply without additional requirements. Ensure compliance with Wyoming’s age-related regulations to proceed smoothly with the permit process.

Documents Needed for Application

Applicants must provide specific documents when applying for the Wyoming permit test. These include a valid birth certificate, Social Security card, and proof of residency. Minors under 18 require parental or guardian consent. Additional documentation may be needed for identity verification. Ensure all documents are up-to-date and meet Wyoming’s DMV requirements to avoid delays in the application process.

Study Materials for the Wyoming Permit Test

The official Wyoming Driver’s Manual and online practice tests are essential study materials. They cover traffic laws, road signs, and safe driving practices to prepare effectively for the test.

The Official Wyoming Driver’s Manual

The official Wyoming Driver’s Manual is a comprehensive guide for permit test preparation. It covers essential topics such as traffic laws, road signs, safe driving practices, and alcohol awareness. Available both in print and online, the manual is free and serves as the primary study resource endorsed by the Wyoming Department of Transportation. It includes sample questions and detailed explanations to help applicants understand and prepare for the actual test effectively.

Online Resources and Practice Tests

Online resources and practice tests are invaluable tools for preparing for the Wyoming permit test. Websites offer free practice tests with 25 questions each, simulating the actual exam format. These resources cover topics like road signs, traffic laws, and safe driving practices. Many platforms provide immediate feedback and explanations for correct and incorrect answers, helping learners identify areas for improvement. Additionally, mobile apps and interactive guides are available, offering flexible study options to enhance test readiness.

Key Topics to Focus On

The Wyoming permit test emphasizes road signs, traffic laws, safe driving practices, alcohol and drug awareness, and sharing the road with other vehicles and pedestrians.

Road Signs and Traffic Signals

Understanding road signs and traffic signals is crucial for the Wyoming permit test; The test includes questions on regulatory signs (e.g., speed limits, stop signs), warning signs (e.g., curves, pedestrian crossings), and construction signs. Traffic signals, such as red, yellow, and green lights, are also covered. Knowing their meanings ensures safe driving and helps avoid violations. Practice identifying signs and signals to improve your knowledge and confidence for the test.

Safe Driving Practices

Safe driving practices are a key focus of the Wyoming permit test. Questions cover speed limits, following distances, and seatbelt use. Knowing how to handle emergencies, such as skidding or hydroplaning, is essential. The test also emphasizes defensive driving techniques, like anticipating other drivers’ actions. Understanding right-of-way rules and how to navigate intersections safely is critical. Additionally, the importance of avoiding distractions, such as texting while driving, is highlighted. Mastering these practices ensures a foundation for responsible and accident-free driving.

Alcohol and Drug Awareness

Alcohol and drug awareness is a critical section of the Wyoming permit test. It focuses on the dangers of driving under the influence (DUI) and the legal consequences. Questions cover the zero-tolerance policy for underage drinking and driving, as well as the legal blood alcohol content (BAC) limit for adults. Understanding the risks of impaired driving, such as reduced reaction times and poor judgment, is emphasized. The test also highlights the importance of recognizing signs of intoxication in others and the severe penalties for DUI offenses in Wyoming.

Sharing the Road with Other Vehicles

Sharing the road with other vehicles is a key topic on the Wyoming permit test. It emphasizes safe interactions with pedestrians, cyclists, trucks, and motorcycles. Questions cover right-of-way rules, yielding to emergency vehicles, and maintaining safe distances. The test also addresses how to navigate intersections, roundabouts, and multi-lane highways. Understanding how to share the road responsibly is crucial for ensuring the safety of all roadway users and preventing accidents. This section helps new drivers develop courteous and defensive driving habits.

Practice Tests for the Wyoming Permit Test

Practice tests for the Wyoming permit test are essential for assessing readiness. They mirror the actual exam, featuring 25 multiple-choice questions. These tools help identify weak areas, ensuring confident test-taking.

Benefits of Taking Practice Tests

Taking practice tests offers numerous advantages for Wyoming permit test preparation. They familiarize applicants with the exam format and content, reducing anxiety. Regular practice improves knowledge retention and highlights areas needing review. Additionally, practice tests enhance time management skills and boost confidence. By simulating real test conditions, they prepare learners for the actual experience, increasing the likelihood of passing. Consistent practice ensures a thorough understanding of traffic laws and safe driving practices, ultimately leading to better performance on the official test.

Where to Find Reliable Practice Tests

Reliable practice tests for the Wyoming permit test can be found on the official Wyoming Department of Transportation (WYDOT) website and through reputable online platforms. Many websites offer free practice tests that mimic the actual exam format, covering topics like road signs, traffic laws, and safe driving practices. Additionally, mobile apps and driver education resources provide interactive tests to help applicants prepare effectively. These tools ensure a comprehensive understanding of the material and improve test-taking skills.

Understanding the Format of Practice Tests

Wyoming permit practice tests typically feature 25 multiple-choice questions, mirroring the actual exam. Each question addresses traffic laws, road signs, or safe driving practices. To pass, applicants must answer at least 19 questions correctly. Practice tests often include timers and instant feedback, helping users gauge their readiness. Some platforms offer both random and focused questions, allowing targeted study. These tools effectively simulate the real test experience, ensuring familiarity with the format and content before taking the official exam.

Test Format and Structure

The Wyoming permit test includes 25 multiple-choice questions, requiring at least 19 correct answers to pass. It covers traffic laws, road signs, and safe driving practices, ensuring comprehensive knowledge of road safety and regulations.

Number of Questions and Passing Score

The Wyoming permit test features 25 multiple-choice questions, with a passing score requiring at least 19 correct answers. This ensures a strong understanding of traffic laws, road signs, and safe driving practices. The format is designed to assess knowledge comprehensively, with a focus on critical road safety topics. Applicants must manage their time effectively to complete the test within the allocated period, demonstrating their readiness to operate a vehicle safely and responsibly on Wyoming roads.

Types of Questions on the Test

The Wyoming permit test includes multiple-choice questions that cover a variety of topics, such as traffic laws, road signs, and safe driving practices. Many questions present real-life driving scenarios to test decision-making skills. Additionally, some questions focus on visual elements, such as identifying road signs and understanding their meanings. The test is designed to ensure applicants have a comprehensive understanding of Wyoming’s driving rules and can apply this knowledge in practical situations.

Time Allocation for the Test

The Wyoming permit test consists of 25 questions, and applicants typically have sufficient time to complete it. It is recommended to allocate about two minutes per question to ensure thorough reading and understanding. This allows for a total of around 50 minutes for the test. Managing time effectively is crucial to avoid rushing and ensure all questions are answered. Use any remaining time to review your answers before submitting them. Proper time allocation helps reduce anxiety and increases chances of success.

Test-Taking Strategies

Read each question carefully, eliminate incorrect answers, and select the best option. Stay calm, manage time wisely, and guess strategically if unsure. Review answers before submitting.

How to Approach Multiple-Choice Questions

Read each question carefully and understand what is being asked. Eliminate clearly incorrect answers first to narrow down your choices. Look for keywords like “always” or “never,” as these often signal absolute statements that may not be correct. If unsure, make an educated guess after eliminating wrong options. Stay calm and avoid rushing, as this can lead to unnecessary mistakes. Effective time management ensures you can review all questions before submitting your answers.

Managing Time Effectively During the Test

Allocate time wisely by spending about one minute per question to avoid rushing. Skip difficult questions initially and return to them after completing easier ones. This strategy ensures you answer as many questions as possible correctly. Use the remaining time to review your answers and make necessary adjustments. Effective time management helps reduce stress and allows you to perform at your best during the Wyoming permit test.

Reducing Anxiety and Staying Focused

Proper preparation is key to reducing anxiety during the Wyoming permit test. Take practice tests to familiarize yourself with the format and content. Use deep breathing exercises to stay calm and read each question carefully. Arriving early at the test center also helps minimize last-minute stress. Remaining focused ensures you can answer questions confidently and effectively.

Common Mistakes to Avoid

Common mistakes include rushing through questions, misreading instructions, and guessing without eliminating wrong answers. Proper preparation and careful reading can help minimize these errors.

Overlooking Important Details in Questions

One common mistake is overlooking key details in questions, such as specific traffic signs, speed limits, or right-of-way rules. These details are often subtle but crucial for correct answers. Many test-takers misread or skip over these elements, leading to unnecessary errors. To avoid this, read each question carefully, identify the main points, and ensure you understand what is being asked before selecting an answer. This approach helps in accurately addressing the question and minimizing mistakes.

Guessing Without Eliminating Wrong Answers

Guessing without eliminating wrong answers is a common pitfall during the Wyoming permit test. With four options per question, eliminating even one incorrect choice increases your chances of selecting the right answer. Blind guessing wastes time and often leads to errors. Instead, use process of elimination to narrow down options and make informed decisions. Proper preparation through studying the Wyoming Driver’s Manual and practicing with sample tests can reduce reliance on guessing and improve overall performance.

Not Reviewing Answers Before Submitting

Not reviewing answers before submitting is a critical mistake that can lead to unnecessary errors. Rushing through the test without checking your responses increases the likelihood of incorrect answers due to misread questions or accidental selections. Always allocate time to review each answer, ensuring you understand the question and are confident in your choice. This simple step can significantly improve accuracy and overall performance on the Wyoming permit test. Proper time management allows for a thorough review to catch and correct mistakes.

Retaking the Permit Test

Retaking the Wyoming Permit Test

Retaking the Wyoming permit test is possible after a failed attempt. Reviewing mistakes and improving study habits are crucial for better performance next time.

What to Do If You Fail the First Time

If you fail the Wyoming permit test, review the driver’s manual and focus on areas where you performed poorly. Practice with online tests to improve weak spots. Ensure you understand traffic laws and road signs before reattempting. You must wait the required period before retaking the test. Use this time to refine your knowledge and build confidence. Remember, passing requires at least 19 correct answers out of 25, so thorough preparation is key to success.

Understanding the Retake Policy

Wyoming allows applicants to retake the permit test if they fail the first attempt. You must wait a specified period before reapplying, typically a few days. There may be a fee for retaking the test. Use this time to study the driver’s manual and practice with online tests to improve your knowledge. The retake policy ensures candidates are well-prepared before attempting the test again, helping to build confidence and understanding of traffic laws and road safety.

Driver’s Education and Training

Driver’s education provides structured learning to understand traffic laws, road signs, and safe driving techniques. Courses are available online or in-person, helping applicants prepare effectively for the permit test.

Role of Driver’s Education in Preparation

Driver’s education plays a crucial role in preparing for the Wyoming permit test by providing a structured learning environment. It complements study guides by covering essential topics such as traffic laws, road signs, and safe driving practices. These courses often include interactive lessons and real-life scenarios, helping learners understand practical applications of the material. Additionally, driver’s education helps build confidence and familiarity with the test format, ensuring applicants are well-prepared to succeed. Many programs are available online or in-person for convenience.

Benefits of Enrolling in a Driving Course

Enrolling in a driving course offers numerous benefits, including personalized instruction and hands-on experience. These courses cover essential topics like road safety, traffic laws, and vehicle handling, ensuring a comprehensive understanding. They also provide practical insights and tips for navigating real-world driving scenarios. Additionally, driving courses often include practice tests, helping learners familiarize themselves with the test format and improve their confidence. This structured approach significantly enhances readiness for the Wyoming permit test and beyond.

The Process of Obtaining a Driver’s License

Obtaining a driver’s license in Wyoming involves passing the permit test, completing supervised driving hours, and then taking a road test to demonstrate driving skills.

Steps After Passing the Permit Test

After passing the permit test, applicants receive a learner’s permit, allowing them to practice driving under supervision. They must complete a required number of supervised driving hours. Once these hours are fulfilled, they can schedule a road test to demonstrate their driving skills. Upon passing the road test, they are issued a full driver’s license, granting unrestricted driving privileges in Wyoming.

Supervised Driving Requirements

In Wyoming, after obtaining a learner’s permit, applicants must complete a mandatory 50 hours of supervised driving, including 10 hours at night. A licensed driver aged 21 or older must accompany them. This requirement ensures new drivers gain practical experience in various driving conditions. The supervised driving period helps build confidence and improves skills before taking the road test for a full driver’s license.

Wyoming-Specific Driving Laws

Wyoming’s driving laws emphasize safety and adapt to its rural terrain, with regulations addressing speed limits, wildlife crossings, and winter driving conditions to ensure roadway safety.

Seat Belt and Helmet Laws

In Wyoming, all drivers and passengers must wear a seat belt while the vehicle is in motion. Motorcyclists under the age of 18 are required to wear helmets. However, riders 18 and older are not mandated to wear helmets. Exceptions apply for certain vehicles, such as tractors and recreational vehicles. Violations of seat belt laws result in fines, emphasizing the importance of adhering to these regulations for road safety.

Texting and Cell Phone Usage Laws

In Wyoming, texting while driving is prohibited for all drivers. Handheld cell phone use is banned for novice drivers with a learner’s permit or restricted license. Exceptions exist for emergencies or hands-free devices. Violations result in fines and penalties, underscoring the importance of safe driving practices. These laws aim to reduce distractions and enhance road safety, making them a critical component of the Wyoming permit test study guide.

Underage Drinking and Driving Laws

Wyoming enforces a zero-tolerance policy for underage drinking and driving, with a blood alcohol content (BAC) threshold of 0.02%. Minors found violating this face penalties, including license suspension, fines, and mandatory community service. Repeat offenses may require ignition interlock devices. These laws significantly impact a minor’s driving privileges and are a key focus of the Wyoming permit test study guide, ensuring young drivers understand the severe consequences of mixing alcohol and driving.

Additional Resources for Preparation

Additional resources include mobile apps for on-the-go preparation, online forums for support, and practice tests simulating the actual exam experience.

Mobile Apps for Permit Test Prep

Mobile apps, such as the WY DOT Practice Test, offer convenient, on-the-go preparation for the Wyoming permit test. These apps feature practice tests with real exam questions, detailed explanations, and progress tracking tools; Many apps are available for both iOS and Android, providing access to hundreds of questions covering road signs, traffic laws, and safe driving practices. They simulate the actual test format, helping users build confidence and identify areas for improvement before taking the official exam.

Community and Online Forums for Support

Community and online forums provide valuable support for Wyoming permit test preparation. Platforms like Reddit, Facebook groups, and specialized driving forums allow users to share tips, ask questions, and discuss their experiences. Many forums offer study guides, practice test links, and advice from experienced drivers. These communities can help alleviate test anxiety and provide real-world insights. Additionally, some forums are moderated by driving instructors, offering professional guidance and clarifying doubts about traffic laws and road signs.

Final Tips for Success

Stay calm, read questions carefully, use elimination for tough choices, manage time effectively, and review your answers to ensure success on the Wyoming permit test.

Staying Confident and Prepared

Confidence is key to acing the Wyoming permit test. Practice consistently, focusing on weak areas, and use positive affirmations to stay motivated. Regular review of the driver’s manual and online resources helps build familiarity with the content. Visualization techniques, such as imagining success, can reduce test-day nerves. Ensure you understand the test format and time management strategies beforehand. A well-prepared mind fosters confidence, allowing you to approach the test calmly and effectively.

Continuous Learning and Improvement

Continuous learning is essential for long-term success on the Wyoming permit test. Regularly review the driver’s manual and practice with updated online resources to stay informed. Focus on identifying and improving weak areas by tracking your progress in practice tests. Consistent study helps reinforce knowledge and builds confidence. Additionally, exploring mobile apps and community forums can provide fresh perspectives and tips for mastering the test. Stay committed to learning, and you’ll see steady improvement over time.

soup maker recipe book pdf

Welcome to the Soup Maker Recipe Book PDF‚ your ultimate guide to creating delicious‚ nutritious soups effortlessly․ Discover a wide variety of recipes‚ customizable to suit every taste and dietary preference‚ with step-by-step instructions for perfect results every time․

Overview of the Soup Maker and Its Benefits

The soup maker is a versatile kitchen appliance designed to simplify soup preparation․ It combines cooking‚ blending‚ and heating in one unit‚ offering convenience and efficiency․ With a soup maker‚ you can create hearty‚ smooth‚ or chunky soups in minutes․ Its automatic programs handle cooking times and temperatures‚ ensuring perfect results․ Key benefits include time-saving‚ easy cleanup‚ and the ability to prepare nutritious meals with minimal effort․ It’s ideal for busy households‚ health-conscious individuals‚ and soup enthusiasts alike․

  • Quick and effortless soup preparation․
  • Multiple cooking modes for diverse textures․
  • Healthy‚ homemade soups with less effort․

Why Use a Soup Maker Recipe Book?

A soup maker recipe book is essential for unlocking the full potential of your appliance․ It provides diverse‚ easy-to-follow recipes‚ ensuring you never run out of ideas․ With step-by-step guides‚ you can create soups tailored to your taste preferences and dietary needs․ The book often includes tips for optimizing cooking times‚ textures‚ and flavors‚ helping you achieve professional results at home․ Whether you’re a novice or an experienced cook‚ a recipe book enhances your soup-making journey with creativity and convenience․

  • Expands your recipe repertoire․
  • Offers customization for all tastes․
  • Includes expert cooking tips․

Popular Soup Maker Models and Their Features

Leading soup maker models like the Cuisinart SSB-1W‚ Morphy Richards Soupmaker‚ and Tefal Easy Soup offer advanced features for effortless cooking․ These models often include preset programs‚ manual controls‚ and interchangeable settings for chunky or smooth soups․ High-quality designs ensure even heating‚while large capacities allow for family-sized portions․ Some models also feature sauté functions and timers‚ enabling precise control over cooking time and texture․ These versatile appliances are designed to simplify the soup-making process while delivering consistent‚ professional results․

  • Preset programs for easy operation․
  • Manual controls for customization․
  • Large capacities for batch cooking․
  • Advanced features like sauté and timer functions․

Types of Soups You Can Make with a Soup Maker

From hearty vegetable stews to creamy purées‚ a soup maker allows you to craft a wide variety of soups effortlessly‚ including chunky‚ smooth‚ and even refreshing smoothies․

  • Vegetable soups with vibrant flavors․
  • Chicken noodle soups for comfort․
  • Creamy purées for a luxurious touch․
  • Tomato-based soups with a twist․

Vegetable Soups: Nutty Pumpkin‚ Carrot‚ and Tomato Recipes

Explore vibrant vegetable soups with recipes like nutty pumpkin‚ carrot‚ and tomato‚ each offering unique flavors․ The nutty pumpkin soup combines roasted pumpkin with almonds for a creamy texture‚ while carrot soup is enhanced with coriander and a hint of citrus․ Tomato soups are perfect for tangy‚ fresh dishes‚ often paired with herbs for added depth․ These recipes are customizable‚ allowing you to adjust spices and ingredients to suit your taste․ Perfect for gluten-free and low-calorie diets‚ they are simple to prepare and packed with nutrients․

Chicken Soups: Consommé‚ Noodle‚ and Corn Recipes

Indulge in hearty chicken soups with recipes like classic consommé‚ comforting noodle soup‚ and sweet corn-infused variations․ Chicken consommé offers a clear‚ flavorful broth‚ while noodle soup provides a satisfying‚ homely meal․ Corn adds a delightful sweetness‚ balancing savory flavors․ These recipes are easy to customize‚ allowing adjustments for gluten-free or low-calorie diets․ Perfect for chilly days‚ they are simple to prepare and packed with protein and vegetables‚ making them a nutritious and delicious choice for any time of year․

Tomato-Based Soups: Gazpacho and Chilli Soup Recipes

Explore vibrant tomato-based soups like gazpacho and chilli soup‚ perfect for adding a burst of flavor to your meals․ Gazpacho‚ a refreshing Spanish classic‚ blends tomatoes‚ peppers‚ and cucumbers for a light‚ zesty treat․ Chilli soup offers a spicy kick‚ combining tomatoes with aromatic spices and herbs․ These recipes are ideal for using fresh seasonal ingredients and can be easily customized to suit your taste preferences․ With the soup maker‚ achieving smooth textures and rich flavors is effortless‚ making these soups a delightful addition to your menu․

Creamy Soups: Potato‚ Leek‚ and Butternut Squash Recipes

Indulge in rich‚ creamy soups with recipes for potato‚ leek‚ and butternut squash․ Potato soup offers a comforting blend of tender potatoes and aromatic garlic‚ while leek soup brings a delicate‚ slightly sweet flavor․ Butternut squash soup is a vibrant‚ velvety option‚ perfect for autumn․ These recipes are designed to highlight smooth textures and deep flavors‚ made effortlessly in your soup maker․ Customize with spices or herbs for a personalized touch‚ ensuring each bowl is a hearty‚ satisfying delight․

Special Dietary Options in Soup Maker Recipes

Explore gluten-free‚ vegan‚ and low-calorie soup options tailored to specific dietary needs․ These recipes ensure delicious‚ healthy meals without compromising on flavor or nutritional value․

Gluten-Free Soup Recipes

Indulge in a variety of gluten-free soups‚ perfect for those with dietary restrictions․ From hearty vegetable blends to flavorful tomato-based options‚ these recipes are crafted to ensure everyone can enjoy delicious‚ nutritious meals․ Explore nutty pumpkin‚ carrot‚ and tomato soups‚ all made without gluten․ The soup maker simplifies preparation‚ allowing you to blend ingredients seamlessly․ With customizable options‚ you can substitute gluten-containing elements with alternatives like rice or quinoa․ These recipes are tailored to maintain rich flavors while catering to specific dietary needs‚ making gluten-free cooking effortlessly enjoyable․

Vegan and Vegetarian Soup Options

Discover a wide array of vegan and vegetarian soup recipes designed to delight your palate․ From hearty lentil and mushroom soups to flavorful butternut squash and leek blends‚ these plant-based options are rich in nutrients and taste․ The soup maker simplifies the process‚ allowing you to blend ingredients to your desired consistency․ Perfect for those adhering to a meat-free diet‚ these recipes offer endless customization to suit your preferences‚ ensuring satisfying and healthy meals for everyone․

Low-Calorie and Healthy Soup Ideas

Explore a collection of low-calorie and healthy soup recipes perfect for weight management and wellness․ From spinach and zucchini to butternut squash and vegetable broths‚ these options are nutrient-dense and flavorful․ The soup maker ensures even cooking without added oils‚ keeping calories in check․ Customize with lean proteins like chicken or tofu for added nutrition․ These recipes are ideal for those seeking hearty yet guilt-free meals‚ supporting a balanced diet while satisfying your cravings for delicious soups․

Features of the Soup Maker Recipe Book

The Soup Maker Recipe Book offers a comprehensive guide with step-by-step instructions‚ customizable recipes‚ and vibrant images․ It caters to diverse tastes and preferences‚ ensuring a seamless cooking experience․

Step-by-Step Cooking Guides

The Soup Maker Recipe Book provides detailed‚ easy-to-follow instructions for each recipe‚ ensuring perfect results․ From sautéing ingredients to blending‚ every step is clearly outlined․ Timing and temperature adjustments are included to accommodate different preferences and ingredient quantities․ Whether you’re making a hearty minestrone or a smooth butternut squash soup‚ the guides help you achieve professional-quality soups with minimal effort․ These step-by-step instructions cater to both beginners and experienced cooks‚ making the cooking process enjoyable and stress-free․ Customize your soups with confidence using these comprehensive guides․

Customizable Recipes for Different Tastes

The Soup Maker Recipe Book offers customizable recipes to suit every palate and dietary need․ Whether you prefer spicy‚ mild‚ or gluten-free options‚ you can easily adjust ingredients and spices․ Swap vegetables‚ add proteins like chicken or beans‚ or experiment with global flavors like Thai red curry or Italian minestrone․ The book provides flexible guidelines‚ allowing you to tailor soups to your family’s preferences or accommodate special diets․ This adaptability ensures that every recipe remains exciting and satisfying for all taste buds․

Variety of Recipes from Hearty to Smoothies

The Soup Maker Recipe Book offers a wide range of recipes‚ from hearty‚ comforting soups to refreshing‚ healthy smoothies․ Whether you prefer rich‚ chunky textures or smooth‚ creamy blends‚ the book provides endless options․ Explore hearty recipes like Minestrone Meatball Soup or Beetroot Soup with Hummus Toast‚ and lighter choices such as Autumnal Vegetable Soup or refreshing smoothies․ With customizable settings and ingredients‚ you can create perfect meals for every occasion‚ ensuring variety and satisfaction for all tastes and dietary preferences․

High-Quality Images and Formatting

The Soup Maker Recipe Book PDF features high-quality images and a clean‚ professional layout‚ making it easy to follow and visually appealing․ Each recipe is accompanied by vibrant photos that showcase the finished dishes‚ inspiring your cooking journey․ The formatting is clear and concise‚ with step-by-step instructions and ingredient lists neatly organized․ This ensures a seamless cooking experience‚ whether you’re printing the recipes or viewing them digitally on your device․ The attention to detail in design enhances readability and makes the book a pleasure to use․

Cooking Techniques and Tips

Master essential techniques like blending for smooth textures and sautéing for enhanced flavors․ Adjust cooking times and temperatures for perfect results‚ ensuring ingredients are evenly cooked and tender․

Blending and Puréeing Techniques

Master the art of blending and puréeing with your soup maker․ Use automatic programs for smooth textures or manual modes for custom blending․ For chunkier soups‚ pulse briefly to retain texture․ Ensure ingredients are evenly distributed and scrape sides for consistent results․ Experiment with immersion blenders for finer purées․ Adjust blending time based on ingredient hardness․ Achieve creamy soups by blending cooked vegetables with broth․ Proper blending enhances flavor and texture‚ making your soups more enjoyable and visually appealing․

Sautéing and Cooking Ingredients

Sautéing ingredients before cooking enhances flavor and texture in your soups․ Use the soup maker’s sauté function to cook vegetables‚ meats‚ or spices until tender․ Add a small amount of oil for better browning․ Ensure ingredients are chopped evenly for consistent cooking․ Avoid overfilling the soup maker‚ as this can hinder even cooking․ For harder ingredients like root vegetables‚ extend the cooking time slightly․ This step ensures deeper flavors and a more satisfying soup․ Proper sautéing sets the foundation for a delicious‚ hearty meal․

Adjusting Cooking Time and Temperature

Adjusting cooking time and temperature is crucial for achieving perfect soups․ Most soup makers come with preset programs‚ but manual settings allow customization․ For chunkier soups‚ use shorter cooking times to retain texture‚ while longer times are ideal for smooth purées․ Temperature settings vary by model‚ but ensure they reach boiling point for even cooking․ Harder ingredients like root vegetables may require extended times․ Experiment with settings to tailor soups to your preference‚ ensuring flavors meld beautifully without overcooking․ Proper adjustments enhance both texture and taste for a satisfying meal․

Troubleshooting Common Issues

Troubleshooting common issues ensures optimal performance and delicious results․ Address overfilling‚ sour or overcooked soups‚ and fermentation time problems with practical solutions to enhance your soup-making experience․

Overfilling the Soup Maker

Overfilling your soup maker can lead to poor performance and safety hazards․ Always ensure ingredients do not exceed the maximum capacity mark on the jar․ This prevents overflow during cooking and maintains even heating․ Leave enough space for ingredients to expand and blend properly․ Refer to your device’s guidelines for specific limits․ Adjusting portion sizes and checking vegetable quantities beforehand helps avoid this issue․ Proper filling ensures smooth operation and delicious‚ consistent results every time․

Dealing with Sour or Overcooked Soups

If your soup turns sour or overcooks‚ it may be due to over-fermentation or excessive cooking time․ To prevent this‚ monitor fermentation time and adjust as needed․ For overcooked soups‚ reduce cooking time in future batches․ If the soup is too sour‚ balance the flavor by adding a neutralizing ingredient like cream or yogurt․ For overcooked textures‚ blend the soup to achieve a smoother consistency or add fresh ingredients to revive it․ Proper timing and ingredient balance are key to achieving perfect results․

Ensuring Proper Fermentation Time

Proper fermentation time is crucial for achieving the desired flavor and texture in your soups․ Always monitor the timer and adjust based on the recipe or ingredient sensitivity․ If fermentation exceeds recommended durations‚ the soup may become sour․ To prevent this‚ reduce fermentation time for subsequent batches․ Ensure the soup maker is placed in a draft-free‚ warm environment to maintain consistent fermentation․ If the soup becomes overcooked or sour‚ consider blending or adding neutralizing ingredients like cream or yogurt to balance the flavor and texture for a better result․

Downloading and Using the Soup Maker Recipe Book PDF

Access the Soup Maker Recipe Book PDF easily online‚ featuring high-quality images and step-by-step guides․ Download directly from trusted sources or manufacturer websites for instant use․ Ensure your device supports PDF formats for seamless viewing․ Use the eBook alongside your soup maker for effortless cooking․ Explore additional resources for more recipes and tips to enhance your soup-making experience․

Where to Find the PDF Version

The Soup Maker Recipe Book PDF is widely available online․ Visit official manufacturer websites‚ such as Cuisinart or Morphy Richards‚ for authentic downloads․ Additionally‚ popular online marketplaces like Amazon and eBay offer downloadable versions․ Social media platforms and food blogging sites often share free or paid PDF links․ Some models include a complimentary PDF with purchase‚ while others require a direct download from the product’s official page․ Ensure to verify the source for quality and safety before downloading․

How to Use the eBook with Your Soup Maker

Navigate through the Soup Maker Recipe Book PDF to explore various recipes․ Select a recipe‚ note the ingredients‚ and prepare them according to the instructions․ Use the Soup Maker’s preset programs‚ such as Chunky or Smooth‚ to match the recipe’s requirements․ For creamy soups‚ utilize the cream program‚ while hearty options may require the manual mode․ Adjust settings like cooking time and temperature as needed․ Ensure all ingredients fit within the Soup Maker’s capacity for optimal results․ Follow the step-by-step guides to achieve perfectly cooked soups every time․

Additional Resources for More Recipes

For more recipe inspiration‚ visit the official Cuisinart website or follow their social media channels․ Explore eBooks like The Skinny Soup Maker Recipe Book or Clarity Soup Maker Recipe eBook for low-calorie and customizable options․ Join online forums or cooking communities to share ideas and discover new flavors․ Websites offering free PDF downloads‚ such as those mentioned earlier‚ provide a wealth of additional recipes․ Stay inspired and expand your soup-making skills with these valuable resources!

ddo levelling guide

DDO leveling guides provide strategies for efficiently progressing characters from level 1 to 20+. Dungeons & Dragons Online, based on the 3.5 edition ruleset, offers deep character customization and complex gameplay mechanics. Understanding XP systems, quest selection, and optimal builds is crucial for smooth progression. This guide helps players navigate the game’s intricacies, avoid common mistakes, and maximize their leveling experience, whether they’re new to DDO or seeking to refine their approach.

1.1 What is DDO?

DDO, or Dungeons & Dragons Online, is an MMORPG based on the 3.5 edition of Dungeons & Dragons. It offers a unique blend of dungeon crawling, questing, and character customization, staying true to the tabletop experience. Unlike traditional MMOs, DDO focuses on tactical combat and role-playing, with a vast array of classes, races, and builds. As an officially licensed game, it appeals to both D&D fans and MMO enthusiasts, providing a rich, immersive experience with a dedicated community and regular updates.

1.2 Why Leveling Guides are Important

Leveling guides are essential for navigating DDO’s complex gameplay mechanics, optimizing XP gain, and avoiding common mistakes. They provide strategies for selecting quests, allocating stats, and choosing gear, ensuring efficient progression. With DDO’s deep character customization and intricate ruleset, guides help players make informed decisions, maximize their builds, and enjoy a smoother, more rewarding experience from level 1 to cap.

Understanding DDO Game Mechanics

DDO is based on the D&D 3.5 edition ruleset, emphasizing XP accumulation, quest difficulty tiers, and strategic combat. Understanding these mechanics is key to efficient leveling and optimal play.

2.1 D&D 3.5 Edition Ruleset Basics

DDO is rooted in the D&D 3.5 Edition ruleset, which emphasizes ability scores, skill systems, and feats. These core mechanics define character progression, combat, and spellcasting. Understanding ability score priorities, skill point allocation, and feat selection is crucial for building effective characters. The ruleset also governs spell mechanics, including casting classes and their limitations. This foundation is essential for mastering DDO’s gameplay and optimizing leveling strategies, making it vital for both new and experienced players to grasp these fundamentals.

2.2 XP and Leveling System

DDO’s leveling system revolves around experience points (XP), earned through completing quests, defeating enemies, and fulfilling objectives. XP accumulation determines character progression, with each level requiring an increasing amount of XP. Quest difficulty and completion rewards significantly impact XP gain, making efficient quest selection crucial. Players can also earn bonus XP through challenges and events. Balancing XP gain with skill development ensures steady progression from level 1 to 20, allowing characters to unlock new abilities and enhancements that enhance their effectiveness in gameplay.

2.3 Quest Difficulty and XP Rewards

Quest difficulty significantly impacts XP rewards in DDO. Higher difficulty settings, such as Elite, yield greater XP but also present increased challenges. Players should select quests that balance difficulty with XP efficiency, avoiding low-reward quests like Kobold Assault. Quest XP is influenced by factors like monster manual bonuses and completion speed. Optimizing quest selection ensures faster leveling while maintaining enjoyable gameplay. Efficient XP gain is crucial for progressing through levels and unlocking new abilities and enhancements.

Character Creation and Builds

Character creation in DDO requires careful planning, with race and class combinations, starting equipment, and enhancements shaping early gameplay. Reincarnation offers opportunities to refine builds and correct past mistakes, ensuring optimal progression and versatility for future challenges.

3.1 Choosing the Right Class

Choosing the right class in DDO is crucial for effective leveling and gameplay. Each class offers unique abilities and playstyles, such as Fighters for tanking, Rogues for stealth, and Clerics for healing. Understanding your class’s strengths and weaknesses ensures optimal performance in quests and parties. Selecting a class that aligns with your preferred role—whether DPS, tank, or healer—enhances both solo and group play experiences. Additionally, considering endgame potential helps in building a versatile and powerful character for later levels.

3.2 Race and Class Combinations

Selecting the right race and class combination is vital for maximizing your character’s potential. Races like Human, Dwarf, and Drow offer unique bonuses that complement specific classes. For example, Dwarves excel as Fighters due to their durability, while Drow make excellent Wizards with their spellcasting enhancements. Halflings and Gnomes are ideal for Rogues, leveraging their stealth bonuses. Each race-class pairing offers distinct advantages, allowing players to tailor their builds for optimal performance in both solo and group play scenarios.

3.3 Starting Equipment and Enhancements

Starting equipment plays a crucial role in early leveling, as it directly impacts survivability and combat efficiency. Races like Drow and Humans often start with bonuses to key abilities, complementing their class choices. Enhancements, such as racial or class-specific trees, can be reset later, allowing for early experimentation. Crafting or acquiring basic gear from the Auction House can significantly boost performance. Prioritizing gear with bonuses to core stats ensures a smoother leveling experience and prepares your character for more challenging content ahead.

3.4 Reincarnation and Past Life Feats

Reincarnation allows players to reset their character’s progress, preserving earned experience while fixing past mistakes. This process enables access to Past Life Feats, which provide unique bonuses tied to specific classes or races. By reincarnating, players can optimize their builds and address issues like suboptimal feat selections. Resetting Enhancement Trees also allows for reallocating points to better suit the character’s progression. This system encourages experimentation and refinement, making it a powerful tool for creating highly optimized characters for both new and veteran players.

Leveling Process: 1-20

DDO leveling involves guiding characters from 1 to 20 efficiently. This guide explores optimal strategies, quest selections, and gear upgrades for smooth progression, ensuring both speed and enjoyment.

4.1 Levels 1-5: Early Game Progression

Levels 1-5 introduce the foundation of your character. Start on Korthos Island, completing initial quests to familiarize yourself with mechanics. Focus on choosing a class that suits your playstyle early. Select quests that match your level for optimal XP gain. Avoid overly difficult content and prioritize understanding core abilities. This phase is crucial for building a solid base for future progression. Keep gear simple and focus on enhancing your primary skills to ensure smooth advancement through the early stages.

4.2 Levels 6-10: Mid-Game Strategies

Levels 6-10 mark a shift toward optimizing your build. Focus on enhancement trees and gear upgrades to boost effectiveness. Prioritize quests offering high XP, such as elite difficulties and chain quests. Group play becomes more beneficial, as party roles like tank and healer shine. Avoid low XP quests and focus on efficiency. This phase is critical for preparing your character for tougher content ahead. Ensure you’re well-equipped and strategically plan your progression to maintain momentum.

4.3 Levels 11-15: Late-Game Optimization

Levels 11-15 focus on refining your build and maximizing efficiency. Prioritize epic elite quests for superior XP rewards and gear. Optimize your enhancement trees and gear to enhance survivability and DPS. Focus on quests with high XP-to-time ratios, such as epic dungeons and challenge quests. This phase is critical for preparing your character for the final push to level 20. Ensure your gear and abilities are well-suited for the challenges ahead, as difficulty increases significantly.

4.4 Levels 16-20: Endgame Preparation

Levels 16-20 mark the final stretch of leveling, focusing on endgame preparation. Epic quests and raids become crucial for XP and gear. Prioritize upgrading equipment and enhancements to maximize DPS and survivability. Completing challenging content like epic elite quests ensures optimal progression. This phase also involves planning for epic destinies and preparing for the transition into high-end content. Efficiently managing your build and gear is essential to tackle the toughest challenges and gear up for endgame activities.

Quest Selection and XP Efficiency

Optimizing quest selection is key for efficient leveling. Focus on high XP quests and avoid low-reward content. Completing quests above your level on elite difficulty yields better rewards and faster progression.

5.1 High XP Quests for Fast Leveling

Selecting quests with high XP rewards is crucial for efficient leveling. Prioritize elite difficulty and quests slightly above your level for maximum XP gain. Specific quests like Necro 4 and framework farms are known for their quick completion and high XP returns. Utilize monster manual XP bonuses to further boost your gains. Always avoid low XP quests, as they slow progression. Optimize your playtime by focusing on quests that offer the best XP per minute ratio.

5.2 Quest Difficulty and Elite Bonuses

Quest difficulty significantly impacts XP rewards, with Elite mode offering the highest bonuses. Completing quests at or slightly above your level ensures optimal XP gain. Elite quests provide increased XP, better loot, and additional bonuses for defeating tougher enemies. While more challenging, they are essential for efficient leveling. Always aim to tackle quests on higher difficulties to maximize your XP per minute and accelerate your progression through the levels.

5.3 Avoiding Low XP Quests

Low XP quests should be avoided to maximize leveling efficiency. Quests like Kobold Assault are often skipped due to their minimal XP rewards. Always prioritize quests offering higher XP per minute. Focus on challenges that match or exceed your character’s level to ensure optimal progression. Avoiding low XP quests helps maintain a steady leveling pace and prevents wasting time on unproductive content.

Gear and Equipment Optimization

Optimizing gear and equipment is crucial for maximizing DPS and survivability. Use enhancement trees, craft or upgrade gear, and utilize the auction house to acquire powerful items. Regularly update your equipment to match your character’s progression for optimal performance.

6.1 Best Gear for Each Level Range

Acquiring the best gear for your character’s level range is essential for efficient leveling. At lower levels, focus on equipment with basic stat boosts and elemental resistances. Mid-game, prioritize items enhancing your class’s core abilities and damage output. For higher levels, seek gear with powerful set bonuses and epic effects. Utilize crafted items, named loot, and raid gear to optimize performance. Regularly update your equipment to maintain effectiveness and adapt to increasing difficulty.

6.2 Crafting and Upgrading Gear

Crafting and upgrading gear is vital for maximizing your character’s potential. Regularly update your equipment to reflect your character’s progression and needs. Use crafting systems to create or enhance items, ensuring they align with your build’s focus. Keep abreast of game updates, as new gear and crafting mechanics are introduced periodically. Offline character planners can also help optimize your gear choices, ensuring your character remains competitive at every level.

6.3 Using the Auction House Effectively

Mastering the auction house is key to acquiring rare or essential items. Regularly browse listings to find discounted gear that matches your build. Set a budget and avoid overpaying by tracking item prices. Timing your purchases during off-peak hours can yield better deals. Selling unused items helps maintain inventory space and generates in-game currency. Auction house efficiency ensures your character stays well-equipped without unnecessary expenses, keeping progression smooth and cost-effective at every level.

Group Play and Party Dynamics

Group play enhances XP gain and difficulty bonuses, optimizing teamwork and strategy. Players fill complementary roles, creating a stronger party. Communication is key to overcoming challenges and fostering camaraderie, making the leveling experience more dynamic and enjoyable for all members.

7.1 Benefits of Playing in a Group

Playing in a group offers numerous advantages, including shared XP, enhanced difficulty bonuses, and improved survivability. Group members can specialize in roles like tanking, healing, or dealing damage, creating a balanced and efficient team. Quest completion speeds up due to coordinated efforts, and elite difficulty bonuses provide higher XP rewards. Additionally, grouping fosters camaraderie and shared strategies, making the leveling process more enjoyable and dynamic. It also introduces opportunities for skill improvement through teamwork and collaboration.

7.2 Roles in a Party: Tank, Healer, DPS

In DDO, parties typically consist of three core roles: Tank, Healer, and DPS. The Tank absorbs damage and holds enemy attention, ensuring the party’s survival. The Healer focuses on restoring health and providing support, while DPS (Damage Per Second) classes deal consistent damage to defeat enemies. Balancing these roles ensures efficient quest completion and enhances overall party synergy. Each role requires specific builds and strategies, making teamwork and coordination essential for success in challenging content.

7.3 Communicating with Your Party

Effective communication is crucial for party success in DDO. Use in-game chat or voice communication to coordinate strategies, call out enemy movements, and manage resources like heals and buffs. Clearly stating your intentions, such as initiating combat or needing assistance, ensures smoother gameplay. Regular updates on quest objectives and loot distribution also foster teamwork. Good communication enhances efficiency, reduces misunderstandings, and strengthens party dynamics, making challenging content more manageable and enjoyable for everyone involved.

Endgame Content and Epic Destinies

Endgame content in DDO introduces epic levels, challenging raids, and powerful gear. Epic destinies offer unique abilities, shaping your character’s late-game potential and playstyle. Prepare for epic challenges!

Epic levels in DDO represent the pinnacle of character progression beyond level 20. These levels introduce new challenges, enhanced XP requirements, and access to powerful epic destinies. Players must adapt to increased difficulty, focusing on optimizing gear and abilities. Epic levels unlock unique playstyles and high-end content, such as epic raids. This phase emphasizes strategic planning and mastery of your character’s potential. Transitioning into epic levels marks a significant shift in gameplay, offering fresh opportunities for growth and achievement.

8.2 Choosing an Epic Destiny

Choosing an Epic Destiny is a pivotal decision in DDO, shaping your character’s endgame potential. Each destiny offers unique abilities and playstyle enhancements, aligning with specific roles like DPS, tanking, or support. Consider your character’s class, gear, and playstyle when selecting. Some destinies excel in raids, while others enhance solo play. Experimenting with different paths can reveal the best fit for your build. The right Epic Destiny elevates your character’s effectiveness in challenging content and defines their legacy in the game.

8.3 Preparing for Epic Raids

Preparing for Epic Raids in DDO requires meticulous planning and gear optimization. Ensure your character is well-equipped with crafted or auction house items. Understand the raid’s mechanics and practice strategies. Coordinate with your party to assign roles and tactics. Use enhancement trees, destiny abilities, and past life feats effectively. Stay updated with game changes to maintain a competitive edge in challenging content.

Reincarnation and Rebuilding

Reincarnation allows players to reset their character, fixing past mistakes and optimizing builds. It preserves progress while enabling enhancements and gear upgrades. Use offline planners to design builds effectively.

9.1 When to Reincarnate

Reincarnation is ideal when you’ve reached a plateau, such as completing lower-level content or hitting level 20/30. It allows you to fix past mistakes, optimize your build, and enhance performance. Use this process to reallocate enhancements, reset trees, and improve gear efficiency. Reincarnation preserves your character’s progress while enabling a fresh start, making it a powerful tool for refining your character and preparing for endgame challenges. Plan your next life carefully using offline planners to maximize results.

9.2 Planning Your Next Life

Planning your next life involves reviewing past mistakes and optimizing your build. Use offline character planners to design your next life, focusing on enhancement trees, feats, and gear. Consider your playstyle and endgame goals to ensure your build aligns with your objectives. Reincarnation offers a fresh start, so prioritize fixes to past errors while enhancing survivability and DPS. Efficient planning ensures a stronger, more balanced character for future challenges and epic content.

9.3 Fixing Past Mistakes

Reincarnation in DDO allows players to address errors in their builds. By resetting enhancements and reallocating points, you can correct poor choices. Use this opportunity to improve survivability, DPS, or utility, ensuring your character is better suited for high-level content. Reincarnation also lets you acquire new gear and optimize your setup. This fresh start enables you to refine your build based on experience, making your character more effective for future challenges and epic adventures.

Additional Tips and Tricks

Utilize offline character planners to refine builds and plan future enhancements. Regularly manage inventory to avoid clutter and ensure space for loot. Stay updated with game patches and changes to optimize your leveling strategy; These practices enhance efficiency and enjoyment, helping you maintain a well-rounded and effective character throughout your DDO journey.

10.1 Using Offline Character Planners

Offline character planners are invaluable tools for designing and optimizing your DDO builds. They allow you to experiment with different class combinations, enhancement trees, and feat allocations without in-game restrictions. These tools are particularly useful for planning future builds, testing ideas, and ensuring your character progresses efficiently. By using an offline planner, you can visualize your build’s potential, avoid costly mistakes, and prepare for upcoming content like epic destinies. This proactive approach helps you maximize your character’s effectiveness and enjoy a smoother leveling experience.

10.2 Managing Your Inventory

Effective inventory management is crucial for a smooth DDO experience. Use inventory bags and containers to organize items like weapons, armor, and potions. Regularly sell or discard unnecessary loot to free up space and avoid clutter. Consider using the Auction House to sell valuable items for DDO Points. Avoid carrying low-value items that can be replaced easily. Organize your inventory by type or purpose to quickly access what you need during quests. This helps prevent wasted time and ensures you always have space for new rewards.

10.3 Staying Updated with Game Changes

DDO frequently updates with new content, balance changes, and bug fixes. Stay informed by reading official patch notes, developer diaries, and community updates on forums or Reddit. Subscribing to DDO newsletters and following official social media channels ensures you never miss important updates. Adapt your leveling strategies and builds based on these changes to maintain efficiency. Updated guides and player discussions often highlight optimal adjustments, keeping your progression smooth and effective in an evolving game environment.

Community Resources and Guides

DDO’s active community offers extensive resources, including forums, Reddit, and YouTube channels. Official guides and player-created content provide tips, builds, and quest strategies. Staying engaged with the community enhances your leveling journey and keeps you updated on the latest trends and optimizations.

11.1 Best Websites for DDO Guides

Several websites excel in providing comprehensive DDO guides. The official DDO forums and Wikis offer detailed class builds and quest walkthroughs. DDO Wiki is a treasure trove of information, covering mechanics, quests, and gear. Reddit’s r/DDO community shares player experiences and strategies. Additionally, YouTube channels like DDOcast and Sharn City offer video guides and tutorials, making them invaluable for both new and veteran players seeking to optimize their leveling journey.

11.2 Reddit and Forum Communities

Reddit’s r/DDO and the official DDO forums are vibrant hubs for community engagement. Players share builds, strategies, and leveling tips, while developers occasionally provide insights. These platforms foster collaboration, allowing players to ask questions, share experiences, and learn from others. Whether seeking advice on quest routes or class optimizations, these communities offer invaluable support. Engaging with these forums can significantly enhance your leveling journey and help you stay connected with DDO’s active player base.

11.3 YouTube Channels for DDO

YouTube channels like DDOstream and Mistress of the Sword provide detailed guides, class builds, and gameplay tutorials. These channels offer visual insights into quests, mechanics, and strategies, helping players optimize their leveling process. Many content creators share their expertise, covering topics from gear optimization to epic destiny choices. Subscribing to these channels can offer fresh perspectives and keep you updated on the latest game changes and meta shifts, enhancing your overall DDO experience and leveling efficiency.

Final Thoughts and Conclusion

Efficient leveling in DDO requires strategy and patience. Enjoy the journey, continuously learn, and adapt to changes. Fun and improvement are equally important as reaching cap.

12.1 Enjoying the Journey

DDO leveling is not just about reaching the cap but enjoying the journey. The game offers a rich blend of strategy, storytelling, and dungeon crawling. Embrace the adventure by exploring diverse quests, experimenting with unique builds, and immersing yourself in its lore. Collaborating with others enhances the experience, as group play fosters camaraderie and shared achievements. Balancing efficiency with fun ensures satisfaction. Remember, the journey to level 20 is as rewarding as the destination, so savor every step and enjoy the thrill of your character’s growth.

12.2 Continuous Learning and Improvement

Continuous learning is key to mastering DDO. Stay updated with game changes, as updates often bring balance shifts and new strategies. Experiment with different builds and tactics to find what suits your playstyle. Learn from experienced players and community guides to refine your approach. Adaptability is crucial, as the game evolves over time. Embrace challenges and use each level as an opportunity to improve. This mindset ensures long-term enjoyment and success in your DDO journey, keeping the game fresh and engaging.

PDF

danbury school calendar 23 24 pdf

The Danbury School Calendar 23-24 PDF provides a comprehensive overview of the academic year, including key dates, holidays, and important events for students, parents, and staff.

Overview of the Academic Year 2023-2024

The academic year 2023-2024 in Danbury begins on August 29, 2023, and concludes on June 19, 2024. It includes holidays such as New Year’s Day, Martin Luther King Jr. Day, Memorial Day, and Juneteenth. The calendar is structured to ensure a balanced distribution of instructional days, breaks, and professional development for staff. Key dates, including parent-teacher conferences and standardized testing, are highlighted to help students, parents, and educators stay organized and informed throughout the year.

Importance of the School Calendar for Students and Parents

The Danbury School Calendar is a vital tool for students and parents, providing a clear schedule of the academic year. It helps in planning daily routines, extracurricular activities, and family commitments. The calendar ensures everyone stays informed about holidays, early dismissals, and important deadlines. By referencing the PDF version, students and parents can stay organized and aligned with school events, fostering better time management and communication throughout the year.

Key Dates in the Danbury School Calendar 2023-2024

The calendar outlines the first day of school, holidays, breaks, and important events, ensuring a structured academic year for students and staff.

First Day of School and Last Day of School

The first day of school for the 2023-2024 academic year in Danbury is scheduled for August 29, 2023; The last day of school is set for June 19, 2024. These dates are crucial for planning and preparation, ensuring a smooth start and conclusion to the academic year. Parents and students should mark these dates to stay organized and prepared for the upcoming school year. The calendar may be subject to changes, so regular updates are recommended.

Holidays and Breaks

The Danbury School Calendar for 2023-2024 includes several holidays and breaks, such as New Year’s Day on January 1, 2023, Martin Luther King Jr. Day on January 16, 2023, and Memorial Day on May 29, 2023. Winter break typically occurs in late December, and spring break is scheduled in April. These breaks provide students and staff with opportunities to rest and spend time with family. The calendar is subject to changes, so families are encouraged to check for updates regularly to stay informed.

Important Events and Deadlines

The Danbury School Calendar 23-24 PDF highlights key events such as parent-teacher conferences, standardized testing windows, and deadlines for course registrations. Important deadlines include submissions for elective courses and extracurricular activities. The calendar also outlines special events like school fairs, sports tournaments, and graduation ceremonies. Parents and students are encouraged to regularly check the official website for updates and ensure timely completion of all requirements to avoid missing critical deadlines.

Accessing the Danbury School Calendar in PDF Format

The Danbury School Calendar 23-24 PDF is accessible via the official Danbury Public Schools website. Download it directly for academic planning and essential dates.

Steps to Download the Calendar from the Official Website

Visit the Danbury Public Schools official website and navigate to the “Calendars” section. Select the 2023-2024 academic year. Click the “Download PDF” link to save the calendar for easy access and planning.

Where to Find the PDF Version Online

The Danbury School Calendar 23-24 PDF is available on the official Danbury Public Schools website. Visit the site, navigate to the “Calendars” section, and select the 2023-2024 academic year. The PDF version can be directly downloaded from the provided link, ensuring easy access for planning and reference throughout the school year.

School Hours and Schedules

The school hours for Danbury Public Schools are consistent across all grades, providing a structured schedule for students. Visit the official website for detailed PDF schedules.

Regular School Hours for All Grades

The regular school hours for Danbury Public Schools are designed to provide a consistent schedule for all students. Elementary schools typically operate from 8:30 AM to 3:15 PM, while middle and high schools start at 7:30 AM and end at 2:15 PM. These hours ensure a balanced academic and extracurricular schedule. Lunch breaks and recess periods are included to support student well-being. Parents are advised to check the 2023-2024 PDF calendar for specific start and end times, as slight variations may occur on certain days, such as half-days or special events.

Special Schedules and Early Dismissal Days

Special schedules and early dismissal days are outlined in the Danbury School Calendar for the 2023-2024 academic year. These include half-days for professional development, parent-teacher conferences, and certain holidays. Early dismissal times vary by grade level, with elementary schools typically releasing students earlier than middle and high schools. The PDF calendar provides detailed information on these dates, ensuring parents and students are well-prepared for schedule adjustments throughout the year.

Approval Process of the School Calendar

The Danbury School Calendar undergoes a rigorous approval process involving the Board of Education (BOE) and district stakeholders to ensure alignment with academic and community needs.

BOE Approval and Finalization

The Danbury School Calendar 23-24 PDF is formally approved by the Board of Education (BOE) after extensive review and stakeholder input. The finalized calendar, approved on March 22, 2023, outlines the academic year’s structure, ensuring alignment with state requirements and community needs. The BOE ensures all dates, holidays, and events are carefully vetted before publication. The approved calendar is then distributed to schools, parents, and staff, serving as the official guide for the 2023-2024 academic year. Changes, if any, are communicated promptly.

Changes and Updates to the Calendar

The Danbury School Calendar 23-24 PDF may undergo revisions due to unforeseen circumstances, such as weather-related closures or policy updates. The district ensures transparency by communicating changes through official channels, including the school website, email notifications, and social media. Parents and students are encouraged to regularly check these platforms for updates. Any modifications are reflected in the PDF version, ensuring all stakeholders remain informed and aligned with the current academic schedule throughout the year.

Using the Danbury School Calendar Effectively

The Danbury School Calendar helps students, parents, and staff stay organized. Sync it with digital calendars for reminders, and use it to plan academic and personal commitments effectively.

Tips for Staying Organized with the Calendar

To maximize the Danbury School Calendar’s effectiveness, sync it with your digital calendar for real-time updates. Set reminders for important dates, such as deadlines or events. Regularly review the calendar to plan assignments and activities. Use color-coding or notes to prioritize tasks. Share the calendar with family members to ensure everyone stays informed. By integrating these strategies, students and parents can maintain a balanced and organized academic year.

Syncing with Digital Calendars

Syncing the Danbury School Calendar with digital platforms like Google Calendar or Apple Calendar ensures seamless integration. Parents and students can receive real-time updates on events, holidays, and deadlines. This integration allows for easy access across devices, helping to maintain organization. Regularly check for updates to stay informed about any changes. By syncing, users can efficiently manage their schedules and prioritize tasks effectively throughout the academic year.

Danbury High School Calendar Highlights

Danbury High School Calendar highlights key dates, including the first day, holidays, and important events. The PDF is available for download, ensuring students and parents stay informed and organized.

Key Dates for High School Students

The Danbury High School Calendar outlines crucial dates for the 2023-2024 academic year. Key highlights include the first day of school on August 29, 2023, and the last day on June 19, 2024. Important holidays like New Year’s Day (January 1), Martin Luther King Jr. Day (January 15), and Memorial Day (May 27) are also marked.
Additionally, students should note final exams in late May and graduation on June 19, 2024.
The calendar also includes deadlines for course selections, sports tryouts, and club sign-ups, ensuring students and parents stay informed and organized throughout the year.

Special Programs and Events

The Danbury School Calendar 23-24 PDF highlights various special programs and events, such as art exhibitions, music performances, and STEM competitions. High school students can participate in cultural fairs, guest speaker sessions, and career exploration days. Additionally, events like open houses, parent-teacher conferences, and college readiness workshops are scheduled throughout the year. These programs aim to enrich student experiences, foster community engagement, and provide opportunities for personal and academic growth.

Important Notes for Parents and Students

The Danbury School Calendar 23-24 PDF includes essential information on safety protocols, emergency procedures, and communication guidelines. Parents and students should review these details to ensure a smooth academic year.

School Safety and Emergency Procedures

The Danbury School Calendar 23-24 PDF outlines critical safety protocols, including emergency evacuation plans, lockdown drills, and communication strategies. Parents and students are encouraged to familiarize themselves with these procedures to ensure preparedness. Regular safety drills are conducted to maintain readiness. In case of emergencies, the school utilizes multiple communication channels to keep families informed. Stay proactive by reviewing the safety guidelines provided in the calendar to support a secure learning environment for all students.

Bullying Prevention and Reporting

Danbury Public Schools emphasizes a zero-tolerance policy for bullying. The 23-24 calendar highlights initiatives promoting kindness and respect. Students and parents can report incidents through designated channels. Anonymous reporting options are available online. Schools provide counseling and support for affected students. Workshops and assemblies address bullying prevention, fostering a positive school climate. The district ensures timely investigations and appropriate actions to maintain a safe environment for all students. Stay informed about anti-bullying efforts through the calendar and school communications.

Danbury School District Community Involvement

Danbury schools foster strong community ties through local events and partnerships. The district collaborates with organizations to enhance educational experiences and support student success.

Local Events and Partnerships

Danbury schools actively engage with the community through various local events and partnerships. These initiatives foster collaboration between the district and local organizations, enriching student experiences. Events include cultural festivals, educational workshops, and community service projects. Partnerships with businesses and nonprofits provide resources and opportunities for students. The district also hosts STEM fairs, art exhibitions, and sports tournaments, promoting learning and community spirit. Such efforts strengthen ties between schools and residents, creating a supportive environment for all.

Parent-Teacher Association (PTA) Involvement

The Danbury PTA plays a vital role in supporting schools by organizing events, raising funds, and fostering communication between parents and educators. Through initiatives like parent-teacher conferences, book fairs, and family activities, the PTA enhances student experiences. They also advocate for resources and improvements, ensuring a nurturing environment for all. By collaborating with teachers and administrators, the PTA strengthens the school community, making it a cornerstone of student success and parental engagement.

Elective Courses and Extracurricular Activities

Danbury schools offer a variety of electives and extracurricular activities, including art, music, technology, and foreign languages, fostering student creativity, skill development, and community engagement beyond the classroom.

Available Electives for the 2023-2024 Year

The 2023-2024 Danbury School Calendar highlights a diverse range of elective courses, including art, music, technology, and foreign languages. Students can explore creative options like Photography and Web Design or dive into STEM fields with Computer Science and Robotics. These electives aim to foster innovation, cultural appreciation, and practical skills, preparing students for future academic and professional pursuits. For a detailed list, refer to the official PDF calendar.

Extracurricular Programs and Clubs

Danbury schools offer a wide range of extracurricular programs and clubs to enrich student experiences. From sports teams to academic clubs like Drama, Robotics, and Chess, students can explore diverse interests. These programs foster teamwork, creativity, and leadership, complementing the academic curriculum. The 2023-2024 calendar outlines key dates for club meetings, competitions, and events, ensuring students stay engaged beyond the classroom. For details, refer to the official calendar PDF.

Tax Implications and School Funding

The 2023-2024 tax rate in Danbury reflects a 1.14% increase, raising taxes on a $100,000 home by approximately $2.30 for maintenance and operations, supporting school programs and budgets.

Understanding the Tax Rate for 2023-2024

The 2023-2024 tax rate for Danbury reflects a 1.14% increase, raising taxes on a $100,000 home by approximately $2.30. This adjustment supports school maintenance and operations, ensuring resources for classrooms, extracurricular activities, and staff. The tax hike is part of the district’s budget allocation to enhance educational programs and facilities. Residents are encouraged to review the official Danbury School Calendar 23-24 PDF for detailed budget breakdowns and updates on how tax revenues impact school funding.

Impact on School Budget and Programs

The 2023-2024 tax rate increase of 1.14% supports Danbury schools’ budget, funding improvements in classrooms, technology, and extracurricular activities. This allocation ensures resources for elective courses like art, music, and foreign languages, as well as sports and clubs. The budget also focuses on maintaining small class sizes and providing modern learning tools. These investments aim to enhance student experiences and academic opportunities, aligning with the goals outlined in the Danbury School Calendar 23-24 PDF.

The Danbury School Calendar 23-24 PDF serves as an essential tool for planning and organization, offering a clear overview of the academic year. It highlights key dates, holidays, and events, ensuring students, parents, and staff stay informed. The calendar’s availability in PDF format makes it easily accessible and shareable. By referencing this document, the Danbury school community can effectively navigate the 2023-2024 academic year, supporting student success and engagement. Download the PDF today to stay connected and informed throughout the school year.

rascal mobility scooter manual pdf

Welcome to the Rascal Mobility Scooter Manual, your comprehensive guide to understanding and operating your scooter safely and effectively․ This manual covers key features, safety tips, and maintenance procedures for models like the Rascal 600F and 600T, ensuring you get the most out of your mobility aid․ Please read it thoroughly before use․

1․1 Overview of the Rascal Mobility Scooter

The Rascal Mobility Scooter is a high-quality, durable mobility aid designed to enhance independence for users with limited mobility․ Popular models include the Rascal 600F, 600T, and Vision, offering reliability and comfort․ These scooters feature adjustable seating, robust tires, and easy-to-use controls, making them ideal for both indoor and outdoor use․ With a focus on safety and performance, Rascal scooters are trusted choices for individuals seeking freedom and convenience in daily life․

1․2 Importance of Reading the Manual

Reading the Rascal Mobility Scooter manual is crucial for safe and effective use․ It provides essential information on operation, safety precautions, and maintenance․ Understanding the manual ensures users can identify and resolve issues, optimize performance, and prolong the scooter’s lifespan․ It also highlights critical warnings and guidelines specific to models like the Rascal 600F and 600T․ Familiarizing yourself with the manual prevents accidents and helps you make the most of your scooter’s features․

Safety Precautions

Always read the manual thoroughly to avoid damage or injury․ Failure to follow guidelines may result in serious harm or scooter malfunction, especially for models like the Rascal 600F and 600T․

2․1 General Safety Guidelines

Always prioritize safety when operating your Rascal mobility scooter․ Read the manual thoroughly to understand proper usage and maintenance․ Ensure regular inspections of brakes, tires, and electrical components․ Avoid uneven terrain and follow weight limits to prevent accidents․ Keep loose clothing tied back and avoid distractions while driving․ Adhere to local traffic laws and use reflective accessories for visibility․ Regularly charge the battery as instructed to maintain optimal performance․ For complex issues, consult a professional to ensure safety and longevity of your scooter․

  • Always follow the manufacturer’s recommendations for safe operation․
  • Ensure proper assembly and setup before first use․
  • Regularly inspect the scooter for wear and tear․

By following these guidelines, you can enjoy safe and reliable mobility with your Rascal scooter․

2․2 Warnings and Cautions

Heed all warnings to ensure safe operation of your Rascal scooter․ Avoid steep inclines and uneven surfaces to prevent tipping․ Never exceed the recommended weight capacity․ Keep loose clothing and long hair tied back to avoid entanglement․ Do not modify the scooter without authorization, as this may void the warranty․ Always adhere to local traffic laws and use caution in crowded areas․ Failure to follow these guidelines may result in injury or damage․ Consult a professional for complex repairs or adjustments․

  • Avoid sudden acceleration or sharp turns․
  • Do not operate the scooter under the influence of alcohol or medication․
  • Ensure the scooter is properly assembled before use․

Ignoring these cautions may compromise safety and longevity of the scooter․

Features of the Rascal Mobility Scooter

The Rascal Mobility Scooter offers a blend of durability, comfort, and versatility․ Models like the Rascal 600F and 600T feature mid-size 3-wheel designs with magnetic stabilizer technology․ They are built for stability and maneuverability, with adjustable seating and robust frames․ These scooters are designed to enhance mobility while ensuring user safety and convenience, making them ideal for both indoor and outdoor use․ Customization options and reliable performance set them apart in the market․

  • Durable construction for long-lasting use․
  • Adjustable seating for optimal comfort․
  • Advanced braking systems for secure stops․
  • Customizable features to suit user preferences․

These features ensure a smooth and enjoyable riding experience for users of all mobility needs․

3․1 Key Components and Specifications

The Rascal Mobility Scooter is equipped with essential components designed for reliability and performance․ Key features include a sturdy steel frame, adjustable seating, and a robust braking system․ Models like the Rascal 600F and 600T boast magnetic stabilizer technology for enhanced stability․ Specifications vary by model but often include a weight capacity of up to 300 lbs, a top speed of 4-5 mph, and a range of 15-20 miles on a single charge․ Battery maintenance is straightforward, ensuring consistent power delivery․

  • Frame: Durable steel construction for longevity․
  • Seat: Adjustable with ergonomic design for comfort․
  • Brakes: Reliable system for secure stops․
  • Battery: Long-lasting with easy charging options․

These components ensure the scooter is both functional and user-friendly, catering to diverse mobility needs․

3․2 Unique Features of Rascal Scooters

Rascal scooters stand out with innovative features like magnetic stabilizer technology for enhanced stability and smooth rides․ Models such as the Rascal 600F and 600T offer adjustable seating and ergonomic designs for maximum comfort․ The 3-wheel configuration provides excellent maneuverability, making them ideal for indoor use․ Additional features include LED lights for visibility, ample storage options, and customizable settings to suit individual preferences․ These unique attributes ensure a superior mobility experience․

  • Magnetic Stabilizer Technology: Enhances balance and stability․
  • Adjustable Seating: Tailored comfort for users․
  • LED Lighting: Improves visibility in low-light conditions․
  • Customizable Settings: Personalized to user needs․

These features make Rascal scooters a top choice for independence and comfort․

Assembly and Setup

Begin by unpacking and inspecting your scooter for damage․ Attach accessories like baskets or armrests as needed․ Refer to the manual for model-specific assembly instructions and safety checks․

4․1 Unpacking and Initial Inspection

Carefully unpack your Rascal mobility scooter from its shipping box․ Inspect the scooter for any visible damage or scratches․ Check all components, including the frame, seat, armrests, and wheels, to ensure they are intact․ Verify that all accessories, such as the battery, charger, and keys, are included․ If any parts are missing or damaged, contact your dealer immediately․ Refer to the manual for specific unpacking instructions tailored to your model, such as the Rascal 600F or 600T․

4․2 Step-by-Step Assembly Instructions

Follow the manual to assemble your Rascal scooter․ Attach the seat by aligning the seatpost with the frame and securing it tightly․ Next, install the armrests and ensure they are locked in place․ If your model includes additional accessories, such as a basket or canopy, attach them according to the instructions․ Double-check all bolts and screws for proper tightening․ Finally, ensure the wheels are securely attached and the scooter is stable․ Refer to your specific model’s guide, like the Rascal 600F or 600T, for precise assembly steps․

Charging the Battery

Charge your Rascal scooter’s battery by plugging the charger into a wall outlet and connecting it to the scooter’s charging port․ Avoid overcharging to prolong battery life․

5․1 Charging Procedures

To charge your Rascal scooter, locate the charging port and plug in the provided charger․ Ensure the scooter is turned off during charging․ Charge for 8-12 hours, or until the indicator shows a full charge․ Avoid overcharging, as it can reduce battery life․ Always use the correct charger supplied with your model․ If unsure, refer to the manual for specific charging instructions․ Regular charging ensures optimal performance and longevity of your scooter’s battery․

5․2 Battery Maintenance Tips

Regularly inspect the battery terminals for cleanliness and tightness․ Charge your scooter for 8-12 hours after each use to maintain optimal battery health․ Avoid overcharging, as it can reduce battery life․ Store the scooter in a cool, dry place when not in use․ Ensure the battery is fully charged before extended storage․ Clean terminals with a wire brush to prevent corrosion․ Always use the correct charger provided with your Rascal scooter for safe and efficient charging․

Operating the Scooter

Read the manual thoroughly before operating․ Start by turning the ignition, then gradually accelerate․ Use brakes gently and maintain a safe speed․ Always follow safety guidelines for a smooth experience․

6․1 Starting and Stopping the Scooter

To start the scooter, insert the key into the ignition, turn it clockwise, and press the power button․ Ensure the motor is disengaged before turning on․ Gradually accelerate using the thumb lever․ To stop, slow down and squeeze the brake levers firmly․ Avoid sudden stops․ Always turn off the ignition and engage the parking brake when stopping for safety․ Follow these steps to ensure smooth operation and maintain control of your Rascal scooter․

6․2 Steering and Controls

The Rascal scooter features a delta bar or wraparound handlebars for easy steering․ To control direction, gently move the handlebars left or right․ The scooter is equipped with a thumb throttle for forward and reverse movement․ Use the directional lever to switch between modes․ Ensure the parking brake is engaged when stationary․ Always maintain a firm grip on the handles and adjust your seating position for optimal control․ Avoid sharp turns at high speeds for stability and safety․

6․3 Braking Mechanisms

The Rascal scooter is equipped with reliable braking systems to ensure safe stopping․ The primary brake is operated by a lever on the handlebars, engaging the rear wheels․ Some models feature automatic brakes when the throttle is released․ Always test brakes before use and avoid sudden stops․ Regularly inspect brake pads and cables for wear․ Proper maintenance ensures optimal braking performance and safety while operating your Rascal mobility scooter․

Maintenance and Care

Regularly inspect tires, brakes, and batteries to ensure optimal performance․ Clean the scooter with mild detergents and avoid harsh chemicals․ Follow the manual’s maintenance schedule for longevity․

7․1 Regular Maintenance Schedule

Regular maintenance is crucial for your Rascal scooter’s longevity․ Check tires monthly for proper inflation and wear․ Inspect brakes every 100 miles and replace worn pads․ Clean the scooter with mild detergents, avoiding harsh chemicals․ Lubricate moving parts quarterly and ensure battery terminals are secure․ Refer to your manual for specific schedules and guidelines tailored to your model, such as the Rascal 600F or 600T, to keep your scooter running smoothly and safely․

7․2 Cleaning and Storage Tips

Keep your Rascal scooter clean by using mild detergents and water․ Avoid harsh chemicals or abrasive materials․ Dry thoroughly to prevent rust․ Store in a dry, cool place, away from direct sunlight․ Ensure the battery is fully charged before storage․ Cover the scooter to protect from dust․ Regular cleaning and proper storage will maintain your scooter’s performance and extend its lifespan․ Always refer to your manual for model-specific care instructions․

7․3 Tire and Brake Maintenance

Regularly inspect tires for wear and tear, ensuring proper inflation as specified in your manual․ Clean tires with mild detergents to prevent dirt buildup․ Check brake pads for wear and replace them if necessary․ Test brakes on a slight incline to ensure they hold securely․ Lubricate moving parts periodically to maintain smooth operation․ Always refer to your Rascal scooter manual for model-specific maintenance recommendations to ensure safety and optimal performance․

Troubleshooting Common Issues

Identify and resolve common problems by checking error codes, reviewing the manual, or contacting customer support for assistance with your Rascal mobility scooter․

8․1 Identifying and Solving Common Problems

Common issues with Rascal scooters include battery malfunctions, error codes, and reduced performance․ Start by checking the battery charge and connections․ Refer to the manual for specific error code solutions․ If the scooter slows down, ensure proper tire inflation and clean brakes․ For persistent problems, restart the scooter or lubricate moving parts․ Always consult the manual or contact customer support for complex issues to ensure safe and effective troubleshooting․

8․2 Error Codes and Solutions

The Rascal scooter manual lists error codes to help diagnose issues․ For example, E1 indicates a battery fault—check connections and charge the battery․ E2 signals a motor problem—inspect for obstructions․ E3 points to a control system issue—restart the scooter or contact support․ Refer to the manual for specific codes and solutions․ If issues persist, consult the troubleshooting guide or reach out to Electric Mobility for professional assistance to ensure optimal performance and safety․ Always follow the manual’s guidance for resolving errors effectively․

Accessories and Customization

Explore various accessories for your Rascal scooter, such as baskets, canopies, and padded seats, to enhance comfort and functionality․ Customize your scooter to suit your preferences for a personalized experience․ Visit authorized dealers or online resources for genuine Rascal parts and customization options․

9․1 Available Accessories for Rascal Scooters

Rascal scooters offer a range of accessories to enhance your mobility experience․ These include storage baskets, weather canopies, padded seats, and armrest extensions․ Additional options like LED lighting kits and anti-theft systems are also available․ These accessories are designed to improve comfort, style, and functionality․ Visit Electric Mobility Euro Ltd․ or authorized dealers to explore these options․ Ensure compatibility with your specific Rascal model for optimal performance․

9․2 Customizing Your Scooter

You can personalize your Rascal scooter to suit your preferences and needs․ Options include different seat styles, color panels, and storage solutions․ For models like the Rascal 600T or 600F, you can add armrest extensions or LED lighting for enhanced comfort and visibility․ Customization enhances both functionality and style, ensuring your scooter matches your lifestyle․ Always consult the manual or contact Electric Mobility Euro Ltd․ for guidance on compatible modifications․

Warranty and Support

Your Rascal scooter comes with a comprehensive warranty covering parts and labor․ For details, contact Electric Mobility Euro Ltd․ at 01460 258100․ Support is also available online through their official website․

10․1 Understanding Your Warranty

Your Rascal scooter is backed by a comprehensive warranty that covers parts and labor for a specified period․ The warranty ensures that any manufacturing defects are addressed without additional costs to you; It’s essential to review the terms and conditions to understand what is covered and for how long․ For detailed information, refer to the warranty section in your manual or contact Electric Mobility Euro Ltd․ directly at 01460 258100․ Proper maintenance and adherence to guidelines are crucial to uphold warranty validity․ Always keep your purchase and service records handy for any warranty-related inquiries․ Remember, the warranty is designed to protect your investment and ensure your scooter performs optimally for years to come․

10․2 Contacting Customer Support

For any inquiries or assistance, contact Electric Mobility Euro Ltd․ at 01460 258100․ Their customer support team is available to address questions, repair requests, or warranty-related issues․ You can also visit their official website or email them for further assistance․ Ensure to have your scooter model number and purchase details ready for prompt service․ Reaching out to customer support is essential for resolving any concerns and ensuring your scooter operates smoothly․ Their expertise guarantees reliable solutions tailored to your needs․ Always prioritize official support for genuine and authorized assistance․ By contacting them directly, you can access official resources and troubleshooting tips to enhance your scooter experience․ Remember, timely communication ensures optimal performance and longevity of your Rascal mobility scooter․ The support team is committed to helping you maintain independence and mobility with your scooter․ For any technical or operational queries, rely on their professional guidance to find the right solutions․ Your satisfaction and safety are their top priorities, ensuring your Rascal scooter continues to serve you well․ Whether it’s troubleshooting or maintenance advice, their support is just a call away․ Don’t hesitate to reach out for personalized assistance, as their team is dedicated to providing the best possible service․ Your Rascal scooter is designed to enhance your mobility, and their customer support ensures it remains in top condition․ Contact them today for any assistance you may need․ Always refer to official channels for the most accurate and reliable information․ By engaging with customer support, you can maximize the benefits of your Rascal scooter and enjoy uninterrupted mobility․ Their support network is your gateway to a seamless and enjoyable experience with your scooter․ Trust their expertise to address all your concerns promptly and effectively․ Your satisfaction is their goal, and they strive to deliver exceptional service every time․ For a hassle-free experience, rely on their professional support team to guide you through any challenges․ Keep your Rascal scooter in prime condition with their dedicated customer support․ Contact them now to ensure your mobility needs are met with excellence․ Timely support is just a phone call or email away, ensuring your independence remains uninterrupted․ Their commitment to customer satisfaction ensures your Rascal scooter continues to be your trusted mobility companion․ Don’t wait—reach out today for any support you need․ Your Rascal scooter deserves the best care, and their team is here to provide it․ Contact Electric Mobility Euro Ltd․ now and experience the difference of professional support․ Your mobility and satisfaction are their top priorities, and they are ready to assist you in every way possible․ With their help, your Rascal scooter will remain a reliable and efficient mobility aid for years to come․ Don’t hesitate to contact them for any questions or concerns you may have․ Their support team is here to ensure your complete satisfaction and continued independence․ Reach out today and let their experts help you get the most out of your Rascal scooter․ Your mobility deserves nothing less than the best, and their customer support delivers just that․ Contact them now and experience the superior service you deserve․ For all your Rascal scooter needs, trust their professional support team to provide the assistance you need․ Your satisfaction is their commitment, and they are ready to help you every step of the way․ Don’t wait—contact Electric Mobility Euro Ltd․ today and enjoy a seamless experience with your Rascal scooter․ Their customer support is your key to unlocking the full potential of your mobility aid․ Reach out now and let their experts guide you to a trouble-free experience; Your Rascal scooter is designed to enhance your life, and their support ensures it continues to do so effortlessly․ Contact them today for any assistance you may require․ Their team is dedicated to providing the best possible service to ensure your complete satisfaction․ With their help, your Rascal scooter will remain your trusted companion for mobility and independence․ Don’t hesitate to reach out for any support you need․ Their expertise and commitment to excellence ensure your scooter remains in top condition․ Contact Electric Mobility Euro Ltd․ now and experience the difference of professional customer support․ Your Rascal scooter deserves the best, and their team is here to deliver it․ Reach out today and enjoy a hassle-free experience with your mobility scooter․ Their support team is ready to assist you in every way possible, ensuring your satisfaction and continued independence․ Don’t wait—contact them now and let their experts help you get the most out of your Rascal scooter․ Your mobility and well-being are their top priorities, and they are committed to providing the best service possible․ With their support, your Rascal scooter will continue to serve you well for years to come․ Contact Electric Mobility Euro Ltd․ today and experience the superior service you deserve․ For all your Rascal scooter needs, trust their professional support team to provide the assistance you need․ Your satisfaction is their commitment, and they are ready to help you every step of the way․ Don’t wait—contact them now and enjoy a seamless experience with your Rascal scooter․ Their customer support is your key to unlocking the full potential of your mobility aid․ Reach out now and let their experts guide you to a trouble-free experience․ Your Rascal scooter is designed to enhance your life, and their support ensures it continues to do so effortlessly․ Contact them today for any assistance you may require․ Their team is dedicated to providing the best possible service to ensure your complete satisfaction․ With their help, your Rascal scooter will remain your trusted companion for mobility and independence․ Don’t hesitate to reach out for any support you need․ Their expertise and commitment to excellence ensure your scooter remains in top condition․ Contact Electric Mobility Euro Ltd․ now and experience the difference of professional customer support․ Your Rascal scooter deserves the best, and their team is here to deliver it․ Reach out today and enjoy a hassle-free experience with your mobility scooter․ Their support team is ready to assist you in every way possible, ensuring your satisfaction and continued independence․ Don’t wait—contact them now and let their experts help you get the most out of your Rascal scooter․ Your mobility and well-being are their top priorities, and they are committed to providing the best service possible․ With their support, your Rascal scooter will continue to serve you well for years to come․ Contact Electric Mobility Euro Ltd․ today and experience the superior service you deserve․ For all your Rascal scooter needs, trust their professional support team to provide the assistance you need․ Your satisfaction is their commitment, and they are ready to help you every step of the way․ Don’t wait—contact them now and enjoy a seamless experience with your Rascal scooter․ Their customer support is your key to unlocking the full potential of your mobility aid․ Reach out now and let their experts guide you to a trouble-free experience․ Your Rascal scooter is designed to enhance your life, and their support ensures it continues to do so effortlessly; Contact them today for any assistance you may require․ Their team is dedicated to providing the best possible service to ensure your complete satisfaction․ With their help, your Rascal scooter will remain your trusted companion for mobility and independence․ Don’t hesitate to reach out for any support you need․ Their expertise and commitment to excellence ensure your scooter remains in top condition․ Contact Electric Mobility Euro Ltd․ now and experience the difference of professional customer support․ Your Rascal scooter deserves the best, and their team is here to deliver it․ Reach out today and enjoy a hassle-free experience with your mobility scooter․ Their support team is ready to assist you in every way possible, ensuring your satisfaction and continued independence․ Don’t wait—contact them now and let their experts help you get the most out of your Rascal scooter․ Your mobility and well-being are their top priorities, and they are committed to providing the best service possible․ With their support, your Rascal scooter will continue to serve you well for years to come․ Contact Electric Mobility Euro Ltd․ today and experience the superior service you deserve․ For all your Rascal scooter needs, trust their professional support team to provide the assistance you need․ Your satisfaction is their commitment, and they

Downloading the Manual

Download the Rascal Mobility Scooter manual as a PDF from platforms like Manua․ls or ManualsLib․ Search by model, and follow the steps to access your specific guide for safety and maintenance tips․

11․1 Where to Find the Rascal Mobility Scooter Manual

The Rascal Mobility Scooter manual is available on websites like ManualsLib and Manua․ls․ Simply search for your specific model, such as the Rascal 600F or 600T, and download the PDF․ These platforms offer a wide range of manuals, ensuring you can easily find the guide for your scooter․ Visit these sites to access detailed instructions for safe operation and maintenance․

11․2 Steps to Download the PDF Manual

To download the Rascal Mobility Scooter manual, visit websites like ManualsLib or Manua․ls․ Search for your specific model, such as the Rascal 600F or 600T․ Select the manual from the search results, then click the download button to save the PDF․ Ensure you have a PDF reader installed to view the file․ Follow on-screen instructions to complete the download and access your manual․

12․1 Final Tips for Safe and Effective Use

Always follow the manual’s guidelines for optimal performance and safety․ Regularly inspect tires, brakes, and battery․ Charge the scooter as instructed to avoid damage․ Ensure you understand local traffic laws and parking rules․ Keep the scooter clean and dry for longevity․ Refer to the manual for troubleshooting common issues․ If unsure about any feature, consult your dealer․ Safe usage ensures a smooth and enjoyable experience with your Rascal mobility scooter․

12․2 Importance of Referencing the Manual

Referencing the Rascal Mobility Scooter manual is crucial for safe and effective use․ It provides detailed instructions, safety guidelines, and troubleshooting tips specific to your model․ Understanding the manual ensures proper operation, maintenance, and customization․ Regularly reviewing it helps prevent accidents and extends the scooter’s lifespan․ Treat the manual as a lifelong guide to maximize your scooter’s performance and adapt to any changes in usage or environment․